Santa Claus made of colored paper and cotton wool. How to make a Snow Maiden from paper. DIY Santa Claus from colored paper
What is the name of your favorite fairy-tale character in winter children's creativity? This is Santa Claus. He is the main character of crafts that are made in kindergartens and schools, at home and in offices on the eve of the New Year holiday. The basis of such creative works most often it is paper. There are many ways to make Santa Claus out of paper.
Simple applications for little craftsmen
Young children are looking forward to the New Year the most. For them, the New Year's days are a time of miracles and magic. Actively participate The kids are not yet able to prepare for the holiday. Making a small craft will be a memorable event for little ones.
Postcard with applique
A small child also wants to give his loved ones a holiday gift, a simple option for which can be greeting card, made with your own hands. To make it you will need:
- a sheet of white cardboard;
- red and white velvet paper or corrugated cardboard;
- markers;
- cotton wool;
- scissors;
- glue.
Procedure:
- To make a greeting card, a sheet of white cardboard is folded in half along the long side. This blank will be the basis of the craft.
- A fur coat, hat, boots and mittens are cut out of red velvet paper according to a template prepared in advance by an adult assistant.
- The cotton wool is disassembled into small balls. This activity will help your child develop fine motor skills and perseverance.
- A face is drawn on a cardboard blank. Then the fur coat and hat are glued on.
- Cotton balls are placed with glue on the hat and fur coat in the form of an edge. Important! For this work, it is better to use PVA glue, which is applied to small areas with a brush. This will make the craft more neat and reduce glue consumption.
- At the end of making the craft, mittens and boots are glued into place.
If desired, the card can be decorated with glitter and cotton balls, with which depict snow and snowdrifts.
Figured New Year's card
An option for a simple craft - The gift is a silhouette of the head of the main character of the New Year holidays. To create it you need to prepare:
- white cardboard;
- red, black and white paper;
- markers;
- glue;
- scissors.
 Creating a postcard begins by cutting out a base from white cardboard. It is an upside-down ice cream cone. Two small black circles and one larger red circle are cut out of colored paper. These will be the eyes and nose, which are glued to the base on the round side of the workpiece. If it is difficult for a child to cut out circles, then you can draw them using felt-tip pens.
 A cap is cut out of red paper according to the size of the triangular part of the template and glued to the base. A circle and an oval made of white paper are glued on top, the edges of which are cut in the form of a fringe. The oval is glued to the base of the cap and placed on the sharp end of the cap.
White paper is cut into strips 1 cm wide and 10 cm long. About 20-30 pieces are needed. Glue the strips onto the base in the form of a beard. After drying, each strip screwed onto a pencil.
The result is a beautiful craft with an element of volume, which can be used as a postcard, Christmas tree decoration or interior decoration.
Volume paper crafts
You can make Santa Claus out of paper with your own hands not only in the form of a flat applique, but also give it volume.
Paper strip toy
Easy to make volumetric crafts you will need the following parts:
- 11 strips of red paper measuring 1*10 cm;
- 10 strips of paper of the same color 1*15 cm;
- 1 piece of white paper in the shape of an elongated round arch measuring 2*7 cm;
- 2 oval white parts (mustaches);
- 2 small white ovals (edge of sleeves);
- 1 small red circle (nose);
- 1 cotton ball.
 You will also need scissors, a glue stick, a special quilling tool or a rod.
Two balls are assembled from strips of red paper glued together in the form of rings. The large ball will become the body, to which a small ball (head) is attached using glue.
The face and beard are made of white paper. The long part of the arched part is cut with a narrow fringe. It is curled using a quilling tool. On the free side draw eyes and nose. A mustache cut from ovals is glued to the face.
A red strip measuring 1*10 cm is cut in half. Having folded the two parts, cut out the mittens using small scissors. A small white oval is glued to each mitten. The resulting hands are glued at the junction of the spherical parts.
At the end of making the craft, glue a cotton ball in the head and fasten a thread on which the craft is secured on the Christmas tree.
Crafts from scrap materials
 Species New Year's crafts a lot of paper. You can make the main character of the winter holidays from scrap materials that can be found in every home: a toilet paper roll; cotton wool; red, white and black paper; ready-made eyes and nose. You also need to prepare scissors, PVA glue, and a brush.
Cut out a rectangle from white paper. Its length is equal to the diameter of the sleeve plus 1 cm, and the width should be 1-1.5 cm greater than the height of the base. The rectangular figure is coated with glue, not reaching 5-7 mm to the edge, and attached to the base. The free ends of the paper are cut into teeth, covered with glue and folded inside the sleeve.
A red rectangle is glued onto a white base, the length of which is equal to the length of the white figure, and the width is 2/3 of the height of the base. This part is glued to the base. A strip of black paper is glued onto a red background - a belt that is decorated small button.
 A semicircle is cut out of red paper, rolled into a cone and glued to the base on the white side. A large cotton ball is attached to the top of it. The junction of the red cap and the white face is covered with small cotton balls.
The eyes and nose are glued to the front of the figure. Cotton balls are glued around them in the shape of a beard.
This craft can be used as Christmas decorations or a detail for interior decoration.
Quilling is a common technique for making paper crafts. It allows you to create beautiful flat and voluminous crafts. To make a figurine of good winter wizard, you will need a minimum set of materials and tools:
- strips of paper in red, white, black, beige, pink colors 0.7 cm wide;
- glue;
- scissors;
- ruler with round holes;
- quilling tool.
 A tight roll is made from a long strip (two strips of standard length are glued together) of red paper using a rolling tool. Then it is pulled out into a cone shape and coated with glue on the inside.
2 strips of white paper, cut in the form of a fringe. One strip is glued to the bottom of the cone. Another fringe will decorate the cone along its height.
From two standard strips, fold two small cones, cover their bottoms with a fringe of white paper and glue them to the large cone on both sides at an equal distance from the vertical white fringe.
The head of the figurine is assembled from two low cones twisted from beige paper. A 2 mm wide part is cut from one beige strip and rolled into a tight roll. It is glued to the center of the ball head. A long pink strip 2 mm wide is cut in half, two rolls are twisted and glued next to the central one. Small eyes are glued above them.
The hat is a cone made of red paper covered with white fringe. It is coated with glue and glued to the head. The pompom for the hat is twisted from a white ribbon, the edges of which are cut with fine fringe. A drop of glue is used to secure it to the paper structure.
The two parts of the figurine are connected to each other using glue.
The base of the craft is a roll of white paper 3 mm wide. Its length depends on the diameter of the large cone. The base is coated with glue and connected to the main part of the toy.
The craft is completed with paper loops, the width of which is 5 mm. They are glued in place of the beard and hair. Two drop-shaped parts are glued as a mustache. They are formed from white strips twisted into a loose roll.
Such a figurine can become part of the New Year's composition or a Christmas tree toy.
Origami crafts
Origami is a technique of folding various paper shapes. There are many origami techniques. The simplest ones allow even little ones to do simple work. Crafts made using the modular origami technique are suitable for older people. Santa Claus made using the origami technique is an original gift for the New Year holidays.
Origami Santa Claus made of paper
Creating a small figurine is a fairly simple process. To work you will need:
- a sheet of single-sided colored paper, red or blue;
- black and red markers.
 The assembly diagram for this craft is very simple. The main condition is to use paper with a white back side.
Take a rectangular sheet of paper and place it on the work surface, white side up. Its short side is connected to the long side so that the colored part forms an isosceles triangle. Excess paper is cut off.
The resulting square, white side up, is placed in front of you. The fold line is located vertically. The right and left corners are bent symmetrically to the center line. The folds are carefully ironed. The result is a two-color figure.
The acute angle is bent upward. Its top point is at a distance of 1/3 from the white right angle. For small children, this point can be marked with a simple pencil. To do this, use a ruler to divide the white part of the figure into three equal parts and mark the upper segment with a pencil.
The workpiece is turned over with the colored side up. First, bend the white corner completely towards you. Then it is returned to its original position. Step back 1 cm from the resulting line and repeat the fold. The bent corner should coincide with the center line. A strip 1 cm wide is also folded towards itself.
The figure is turned over again and the free corners are folded along the side line. To secure the craft, the junction of the corners is glued together.
The figure is turned over and the eyes and nose are drawn using felt-tip pens. A beard and mustache can be made from the piece of paper left at the beginning of the work: it is divided into strips and cut into fringes. Paper fringe is glued in place of the beard and mustache.
Modular origami technique
 Making crafts from paper triangular modules will require accuracy, patience and attention from the master.
To complete the craft, you will need quite a lot of triangular modules (250 red and white modules and 25 pink triangles). The size of the modules depends on the desired size of the craft. Most often, rectangles measuring 1/16 of an A4 sheet are used.
Detailed diagrams of crafts are widely distributed on the Internet. There you can also find video tutorials on assembling paper modules and figures from them.
 The first three rows of the figure are its base. They are assembled from 25 white modules each, closed into a ring and turned inside out.
The fourth row consists of 25 red modules, which are located with the long side forward.
Starting from row 5, which also consists of 25 elements, they begin to make a beard. To do this, assemble a ring of 22 red and 3 three white modules. In the next 4 rows, the number of white modules is increased by one element. However, their total number remains unchanged.
Ring 10 is made of 25 white triangles.
From the 11th to the 14th row the face of the figure is performed. In the 11th ring one red element is added, which is located clearly in the center figures. Scheme of the next row:
- in the center there are two white elements;
- on each side of them there are 2 pink parts, which are inserted with the short side forward;
- the rest of the ring consists of white modules.
Rows 13 and 14 consist of 25 parts, of which 7 and 8 pink parts will be inserted with the short side forward.
Rows 15 to 18 make up the wizard's hat. Rings 15 and 18 are made up of white modules (22 and 9 elements, respectively). Between them are inserted two red rows, assembled from 20 and 18 elements. The technique of reducing the number of modules is described in many master classes on making modular figures.
Hands made of 9 red and one white module are attached to the resulting figure.
The craft is ready. It can be given as a souvenir by treating it with glue and varnish. You can give your child a figure without gluing, which can be taken apart and made into another interesting craft from its elements.
For the New Year holidays, you can sew Father Frost and the Snow Maiden with your own hands from felt. For such crafts you will need templates and patterns used for making paper appliqués.
Paper is an affordable material from which you can make New Year's crafts of any complexity. This work does not require any special knowledge or skills. When creating paper crafts, you need to show creativity, perseverance, patience and accuracy.
Attention, TODAY only!
You don’t need to look for a special reason to practice with children, because it helps mental development and the formation of useful skills in smart kids. But the theme of all kinds of crafts may differ depending on the season, the child’s mood or upcoming events. So, New Year is the most long-awaited holiday of the year. Absolutely all children remember him as soon as the first cold weather arrives. Naturally, interesting New Year's creativity helps brighten up the anticipation of a bright holiday.
In this article we will tell you how to make a paper Santa Claus from a cone with your own hands; the master class is provided for the convenience of creating crafts together with children. Primary schoolchildren will be able to make such a souvenir, but children of kindergarten age will need the help of adults. Follow the tips to spend time with your children fun and easy.
A funny paper Santa Claus made from a cone is made from the following materials:
- a small sheet of cardboard, preferably one side of it is white;
- scissors;
- scraps of red, white, black and yellow paper;
- glue and stapler;
- white napkin;
- a piece of fabric and thread.
Step-by-step tutorial on how to create a paper Santa Claus from a cone with your own hands
1. Prepare a thick sheet of cardboard in the desired format. The height of the paper Santa Claus will depend on its width.

2. Roll a piece of paper into a cone. For quicker and more secure fastening, use a stapler.

3. Wrap a small piece of red paper around the top of the cone to make a blank for Santa's hat. Cut a rectangle from a ribbed white napkin.
By the way, if you are interested or would like to try your hand at the modular origami technique, then we suggest you make something like this.

4. Roll the rectangle into a tube and glue it to the bottom edge of the hat to imitate white fur.

5. Cover the bottom of the cone with red paper, but leave a white gap between the fur coat and the hat.

6. Glue black dots – eyes and a red nose – onto the front of the paper Santa Claus from the cone. Also frame the lower part of the fur coat with a napkin tube.

7. To make hands, use red paper, roll it into a tube and decorate it with fur from a white napkin.

8. Create a strap from black corrugated paper and a yellow square, and buttons from black circles.

9. Use PVA glue to attach the colored paper Santa Claus sleeves.

10. Make a mustache and beard from white pieces of paper and attach to the craft to complete the look of Santa Claus.

11. Now the funny paper Santa Claus from the cone is ready to take pride of place under the small New Year tree. Be sure to make a small bag out of a piece of fabric secretly from the child and put candy in it.

And from cardboard you can make something like this
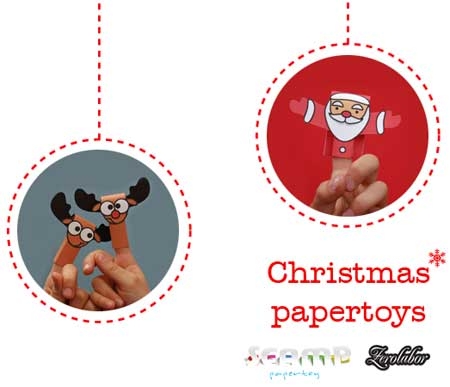
We talked about how to make Christmas trees with your own hands in our last article >>>> As you know, it is customary to put gifts under the Christmas tree, and, of course, Grandfather Frost brings them. Therefore, in this section we will tell and show how to make another popular New Year's craft - Santa Claus from paper. Here you will find a large number of ready-made paper crafts for the New Year. All you need to do is print out the pattern you like, cut it out and glue the craft according to the instructions. Santa Claus-matryoshka, Japanese Santa Claus, dancing Santa Claus, Santa Claus in a reindeer harness, Santa Claus cap and beard, Santa Claus mask, Santa Claus finger puppet, Santa Claus bag, as well as Santa Claus's vehicles (sleigh, bus, train , airplane) - you will find all this in our article.
1. DIY Santa Claus made from paper (option 1)
Homemade Santa Claus - matryoshka. It consists of boxes of different sizes with the image of Santa Claus, which can be nested into each other according to the matryoshka principle. Very easy to make. This paper craft for the New Year can be used as an educational toy.
2. DIY Santa Claus made from paper (option 2)
Santa Claus in company with the Snow Maiden, Snowman, Sasquatch, deer and Elves.

3. Paper Santa Claus (option 3)

4. Origami Santa Claus (option 4)
For this New Year's craft, you will need a square sheet of paper, red on one side and white on the other. For detailed video instructions, see the link.

5. Homemade Santa Claus (option 5)
Miniature Santa Claus from our favorite website CREATIVE PARK from CANON. It can be placed on the table, or you can hang it on the Christmas tree as a homemade Christmas tree decoration.

Dancing Santa Claus from the same site. See link >>>>
Santa Claus in a reindeer sleigh >>>>


Santa Claus hat with beard >>>>

6. Homemade Santa Claus (option 6)
Paper Santa Claus on a sleigh >>>>

7. How to make Santa Claus with your own hands (option 8)
DIY finger puppet Santa Claus made of paper. On the same site you will find a Deer finger puppet. Now you can show a New Year's puppet show.
8. How to make Santa Claus out of paper (option 9)
A whole New Year's scene from the Kirin website: Santa Claus in a reindeer sleigh, a Christmas tree, a snowman, a chest with gifts, etc.

9. How to make Santa Claus out of paper (option 10)
Another homemade Santa Claus made from paper. This paper craft for the New Year is very easy to make.

10. DIY Santa Claus made from paper (option 11)
New Year's paper craft - cheerful Santa Claus on a sleigh. You can download the craft diagram from the link >>>>

11. DIY Santa Claus made from paper (option 12)
The highlight of this New Year's paper craft is that the paper Santa Claus is in a sitting position. It can be placed on the edge of a bookshelf or table, for example. An original DIY New Year's craft from the Disney website FamilyFun.

When preparing for the New Year, there are no trifles. After all, you need to think through everything - decorating your home, the holiday menu, as well as gifts for loved ones. Regarding the last point, it is not always necessary to run to the store. You can prepare gifts yourself, involving your children in this. For example, you can make a lot of New Year's crafts. We suggest doing Santa Claus using origami technique. The process of creating it is simple, if you follow the step-by-step photographs of our master classes from Marina and Vasilisa.
Origami Santa Claus, option No. 1
To make Santa Claus we will prepare:
- 2 squares of red single-sided paper;
- glue.

Initially, the squares should be the same size, we took 10 x 10 cm. From one we will make a head with a cap, and the other square will be needed to make the body. Let's start with the head. To do this, we make small folds on both sides.

We bend a small corner from the opposite edge. This will be the top of the cap.

Now we turn the square to the other side. Here you need to bend a third first.

Then we make a symmetrical fold on the right side.

This is how we formed the Santa Claus hat.

The bottom corner needs to be folded up.

Then we make a slight bend in the opposite direction.

We bend the top part of the cap to the side and, if necessary, glue it a little.

To make the body, take another square. We make small folds on it on opposite sides.

Fold in half.

After this, we unfold it, so we have outlined the middle line. First we bend the left edge to it.

Then we make a symmetrical fold on the right side.

We turn the top part in the form of corners.

We bend the top side down. After this, you can glue a little on the wrong side.

We connect the two parts together. To do this, we will use glue again.


If you wish, you can draw his eyes and mouth. This craft can become part of a New Year's greeting card.

Paper Santa Claus, option No. 2
To create Santa Claus we will prepare:
- a square sheet of red single-sided paper;
- black marker;
- red felt-tip pen.

When making this craft, it is important to use red paper, which will be white on the reverse side. If you don’t have one, then you can take 2 sheets of red and white. First, fold the red square diagonally.

This is how we outlined the middle fold line, which will become a guide in further work.

You first need to bend the right corner to this line.

After this, we perform a symmetrical fold of the left corner.

For further convenience, let’s slightly rotate the blank of the future Santa Claus.

Now you need to fold the workpiece in half. To do this, bend the bottom corner up, aligning it with the top corner.

The next stage we will form the beard of Santa Claus. To do this, bend the top corner down.

Let's make a small border. To do this, we will again bend the upper part in the form of a narrow strip.

We bend the left protruding part back.

Now we need to do the same with the right side of our workpiece.

Let's take a red marker. We will use it to draw a nose. Using a black marker we will mark the eyes.

Our Santa Claus made from paper using the origami technique is ready.

Such a craft can later become part of a New Year’s greeting card.
Marina's master class on how to make paper Christmas tree, look .
Option No. 3
You will need:
- felt-tip pens (or pencils) black and red,
- square sheet of paper 10 by 10 cm (you can take more or less). The paper should be two-colored - white on one side, red on the other. If you don’t have such paper, you can glue together sheets of white and double-sided red paper.

We need to bend our square diagonally.

Unfold the workpiece and also bend it in half along the second diagonal.


We bend the outermost corner to the top of the workpiece.

We see we have a line drawn, we need to turn the corner back.

We turn back. We see that we have a line; we need to bend a corner to it.

Now we can completely wrap up our lapel along with the corner. You will get it like this.

We work with the bottom of the craft. We bend the bottom corner to the top point.

We make a bend to the bottom point.

Turn over:

We make narrow stripes on the sides.

The same on the opposite side.

We see the middle line and bend both sides towards it.

And the second one.

We take the white parts and make a fold along the red line to the white one.

We bend this strip and make a square.

We do the same on the opposite side.

And a square.

And when we turn the figure over, we can see Santa Claus.

You need to draw his eyes and nose.

To make Santa Claus out of paper, you can use different techniques. Let's make an applique from paper on cardboard or postcard.
To complete the applique, you need to glue the Santa Claus figurine piece by piece to the paper.
We use colored paper, glue, scissors and ready-made templates.


We cut out the head with a beard and a cap, the body in a fur coat and glue it on.


Let's make Santa Claus from strips of paper as a Christmas tree decoration:


The fastest way to make an application is to use disposable plates:


You can also make a postcard with a picture of Santa Claus from paper:


For the postcard, you need to glue the parts and pieces together to make a Santa Claus figurine.


You can make gift wrapping with Santa Claus from paper. To do this, there must be ready-made templates for the box. Glue the Santa Claus figurine to the box.

Another simple way to make Santa Claus out of paper is to make a cylinder out of cardboard, glue a hat out of paper, a mustache and beard out of cotton wool, draw eyes and a mouth:


Crafts with Santa Claus can also be made from cotton pads and balls.
You can also create a paper craft with Santa Claus using the origami technique. To do this, we fold colored paper many times, as in the diagram:

From individual modules, you can also lay out a craft with Santa Morse step by step in the modular origami technique. We lay out the modules in rows, according to the diagram or master class.

An original craft with Santa Claus can be made from strips of paper using the quilling technique. The craft can be either on cardboard in the form of a postcard or in three-dimensional format 2D, 3D.
To create Santa Claus using the quilling technique, we twist paper strips into shapes and lay them out sequentially to create a finished image.


You can also use paper to make Santa Claus using the technique papercraft according to ready-made schemes.
Happy creativity!

And I would like to suggest making Santa Claus out of paper in this way according to the scheme:

Or like this:

To make Santa Claus out of paper, bedet, you need to take one-sided colored paper exactly red and then proceed to step-by-step folding. Just draw out the elements of the face with a pen or black felt-tip pen.
Crafting Santa Claus from paper for the New Year is done in an incredibly large number of ways, but in my answer I will focus only on those that are easy to do and can be made as New Year’s crafts with a child in kindergarten or school.
The first Santa Claus is made using the origami technique, follow the steps of the photo master class and you will get a beautiful, quick New Year's craft:

You can also make Santa Claus from improvised materials; you can use napkins and disposable paper plates:


It’s easy to make a paper Santa Claus craft from ready-made diagrams that need to be printed on a color printer, cut out and glued, see below:


There are many ideas on how to make Santa Claus out of paper, and one cannot ignore such a popular form of creativity as origami.
You can make origami Santa Claus by repeating the steps of this detailed diagram:

Santa Claus with a bag of gifts! You can complete the facial features, this will make Frost even better!
You can make Santa Claus out of paper using a different technique using strips of paper:

For a detailed master class, see the link.
Another diagram. Using it you need to cut out Santa Claus from paper. This craft can be done with children:

Video on how to make Frost out of paper:
You can make Santa Claus from paper very simply; there are a lot of manufacturing techniques. For example, you can download and print Grandfather’s blanks on a color printer. Then cut and glue, if desired, decorate with sparkles, beads, sequins or tinsel.


Recently, modular origami has become fashionable, where small pieces are used to make a three-dimensional craft on absolutely any theme.
Video master class of modular Santa Claus with your own hands.
Also relevant are various applications with Santa Claus in children's crafts for competitions in kindergarten or school. Video master class with an application for the New Year together with a child.
I'll offer a few more options.
1) Wall-mounted option, easy to do with your child, and the beard options can be any, not necessarily glued rings, just cut paper:

2) Here’s an option, you’ll need... cores from toilet paper rolls:

3) Print on a color printer or simply redraw and color, then assemble:

4) I like this option the most, it’s so original and at the same time uncomplicated:

5) Elegant origami with Santa Claus, it turns out plump like this:
6) Another option with origami, this time talking Santa Claus:

7) Here is a master class on how to make origami like this Santa Claus, I think this one is most similar to our real Santa Claus:

Do Santa Claus made of paper easy enough. To do this, roll a piece of paper (white) into a cone, cut it with scissors where necessary and glue it together. The cone that we get should be stable. Next, we’ll draw Santa Claus’s eyes, mouth, nose, cheeks, hat and hands using felt-tip pens or paints. And from paper we will glue eyebrows, hair, beard and fringe to the fur coat. Next, cut out the fringe from paper and glue it to Santa Claus’s hat. Let's decorate Santa Claus' sheepskin coat with snowflakes. As a result, you will get Santa Claus, as in this photo:

Or the second one version of paper Santa Claus. Let's print the picture attached below. Next, cut out the parts of Santa Claus, fold them and glue them together, as in this diagram:

It's easy to make Santa Claus out of paper. Eg. You can use this lesson and make Santa Claus.

To make it, you only need a sheet of paper (the paper should be red on one side and white on the other) and scissors. Cut out a rectangle, then place the sheet in front of you so that one of the sharp sides is facing you, then fold the sides as shown in Figure 2. At the next stage, fold the corner with the opposite corner and turn the craft over (Figure 4).
An excellent option for making Santa Claus out of paper with your children. You will need red cardboard, white paper, paints or pencils, some cotton wool or foam, glue and scissors. First, we take red cardboard and make a cone out of it, this is our future hat. We decorate the cone on the top and along the edge with cotton wool, just glue it with glue. Next, we take cardboard of yellow, white or beige color and again make a cone, but larger in size than the red one (hat), this will be our Grandfather’s body. Now, with a pencil, draw the contours that will separate the face and clothes. We paint the bottom red, and draw eyes and cheeks on the face. The beard can be made from paper, cut it into strips, or glue it with cotton wool. We again glue cotton wool onto the hem, collar and along the body. We draw the hands, cut them out and glue them to the body. By the way, you don’t have to glue the cotton wool, you can just paint it with white paint, but with cotton wool the craft will look more beautiful.
They are all quite easy to make. You can also try Santa Claus from origami modules. It will turn out something like this.

Of course, such work will require much more effort and time, but such a souvenir can be given to someone for a holiday.