Do-it-yourself marble paths. We lay natural stone paths. Methods and step-by-step instructions. Do-it-yourself natural stone path - we build correctly
Similar articles
Roulette;
Natural stone benefits
Shovel;
Paving stones selection
Preparing the base of the garden path
 Wooden boards;
Types of stones to create a path
You can lay stone slabs directly on the ground. For this, a layer of soil is preliminarily cut, equal to half the thickness of the slab and corresponding to it in shape.
Natural limestone
 Layer that evens out all previous
Garden path made of stone The unique paving of paths with natural stone is a valuable design element that creates harmony between the summer resident and the surrounding landscape. It often happens that the smaller the suburban area, the more important the elements of the suburban decor become. In this case, paving paths with natural stone would be the right choice. The combination of stones and green lawn creates an inimitable contrast. At the same time, you can diversify the lawn with plants that have unusual shades and texture ...
Level.

Rubber hammer;
Other hard rocks
Pegs;
Kneading container;
The basic rules that should be followed when creating a durable and reliable track:
DachaDecor.ru
Garden paths made of natural stone, how to choose, we lay garden paths made of natural stone correctly
And, of course, the stone itself.
- Natural stone paths can often be found in places rich in crushed cobblestones, bedding or rubble stones.
Materials used for paving garden paths
Roulette;
- If you are laying not a flat path, but steps, be sure to make sure that their device is correct and reliable. Each stone step must be perfect, otherwise it can disrupt the entire structure. When the path is completely ready, you can start improving the space around it. Natural stone does not need clear boundaries, so nothing can be specially planted around it. Everything here is purely individual.
- Shovel;
- Incorrect inclination of stones is corrected using a sledgehammer with a piece of wood under it. This is necessary, first of all, so that the stones fit as closely as possible to the base, and water cannot seep under them, because when frosts begin, it will expand and raise the components of the path. The wide joints between the trail elements must be filled with mortar.
- Cord;
Laying a path from natural stone, its advantages
Back to the table of contents
It is best to use a layer of compacted sand as a base
The first step is to remove the fertile soil layer. The next step is to add about 20 cm of sand. Then about 15 cm of crushed stone. The described technology will make it possible to make a solid and reliable garden path with your own hands, which will not give in to deformation under loads or bad weather conditions.
- Natural stone is a durable road surface that is durable, resistant to harsh climatic conditions, constant aesthetic texture quality and environmental friendliness. The listed properties of natural stone are far from all of its positive characteristics.
Level.
Table of proportions of concrete components when using cement grade M400 (cement, sand, crushed stone).
- Rubber hammer;
- Using sticks and a laser level, measure out how many steps are needed to achieve the required height. You can use a circular saw to cut stones for steps. A tool with a 14 ”diamond blade can cut stones up to 10 cm thick, but this blade cannot handle stones 15 cm thick. To break such stones, use a sledgehammer and wedges.
- Pegs;
Stones should be chosen strong, hard rocks, for example - pebbles, dense sandstone, granite, cobblestone
- The following advantages of hand-made stone paths should be noted:
- The use of natural stone during landscaping guarantees the transformation of the suburban area. It is guaranteed to become more aesthetic, natural, harmonious, and will resemble a corner of the wild.
Garden paths made of natural stone granite
The suburban path must be made reliable and beautiful. In this case, the material used for the construction of the track plays an essential role.
What brand of cement is best for you? Experts believe that it is not lower than the M500. So, the next solution is. The proportions are as follows: 3 parts of the sand component to 1 part of the cement. Water is added until a solution of the desired consistency is obtained.
Roulette;
- If you are laying not a flat path, but steps, be sure to make sure that their device is correct and reliable. Each stone step must be perfect, otherwise it can disrupt the entire structure. When the path is completely ready, you can start improving the space around it. Natural stone does not need clear boundaries, so nothing can be specially planted around it. Everything here is purely individual.
- Shovel;
- When laying stones, you should leave gaps between them; they can be filled with soil and sowed with lawn grass, they can be covered with sand, to give a more decorative look, the gaps can be covered with gravel, which matches the color of the base material
- Individuality of the coating and external sophistication;
- The choice of material for paving paths should be based on specific stylistic decisions about the landscape design of your site. Thanks to the layout of stones, you can achieve a high-quality artistic and decorative effect.
Before you buy a natural stone for a garden path, you need to decide on the technology of paving. Today, there are three main options for the execution of stone paths: laying sandstone on sand, paving a path on a gravel bed, facing a concrete base.
It must meet the properties of sufficient density and plasticity. Do not forget that if you double the amount of water (the ratio of water to cement), then the grade of concrete will decrease by about 5 times.
How to make an original path in the garden
Level.
Table of proportions of concrete components when using cement grade M400 (cement, sand, crushed stone).
Rubber hammer;
Thin, lightweight slabs such as sandstone often require a rock dust base mixed with cement to ensure the best possible fit. Pack the gravel thoroughly. When the tamping is complete, the base will be smooth and firm, ready for natural stone installation.
A drainage system created according to the rules will extend the life of a stone path: longitudinal and transverse
The ability to lay out the stone path with your own hands, without paying for the work of a team of special workers;
- Natural stone, like any other paving for paths, must meet many requirements, depending on the parameters of the surface and the load on it. Natural stone paths must cope with their main function, therefore, in addition to the aesthetic value, the material's resistance to abrasion, cracks and weathering is important.
When laying the path on a sand cushion, the size of the joints between the flagstone should not be more than 2 cm.
- A greasy solution (thick) will be difficult to distribute in the formwork, while a liquid solution will crack during the drying process. So don't go to extremes. In order to prepare the solution with high quality, you can use a portable concrete mixer. If one is not available, and the total area of \u200b\u200bthe tracks is not very large, you can use a sufficiently powerful perforator (with low speed), using a mixer attachment designed for mixtures of a loose nature.
- The suburban path must be made reliable and beautiful. In this case, the material used for the construction of the track plays an essential role.
- What brand of cement is best for you? Experts believe that it is not lower than the M500. So, the next solution is. The proportions are as follows: 3 parts of the sand component to 1 part of the cement. Water is added until a solution of the desired consistency is obtained.
- Roulette;
- The elements can be combined if desired. Before placing the stones in place of the walkway, arrange them in a dry place in order, combining chips and cuts. It takes much less time than cutting and leveling all the ribs. When laying the material, it must be checked with a level.
To protect the bottom of the path from the germination of grass, you can use a geotextile fabric.
Long service life, reliability under various weather conditions, strength under heavy loads;
Those stones that are not resistant to low temperatures will delaminate over time. That is why you need to responsibly approach the choice required materialcorresponding to a number of required parameters.
You may be interested in
strgid.ru
Sand laying is the easiest way. In the case of this method, a thick flagstone (5-8 cm) of large size should be used. In the ground, a bed is arranged under the future track 5 cm deep more than the thickness of the stone used. At the bottom, it is necessary to pour a layer of sand 5 cm thick, carefully level it, spill it with water and tamp it. Stones should be placed on the sand end to end. The thickness of the seams is 1-2 cm. The seams are filled with sand to the top and spilled with water. This option is very good for garden paths, as it does not require a large excavation of land, and the risk of damage to plant roots is minimized. However, this method cannot be used in the case of clay soil prone to heaving. After frost due to water lenses, the track on such soil can warp and lose its presentable appearance.
In order to prepare a solution, dry components are poured into water and mixed until a homogeneous state is achieved. If mixing was carried out mechanically, the strength of the concrete coating increases. Lower strength is typical when mixing concrete with a shovel by hand.Before buying a natural stone for a garden path, you need to decide on the technology of paving. Today, there are three main options for the execution of stone paths: laying sandstone on sand, paving a path on a gravel bed, facing a concrete base.
It must meet the properties of sufficient density and plasticity. Do not forget that if you double the amount of water (the ratio of water to cement), then the grade of concrete will decrease by about 5 times.
Level.
Incorrect inclination of stones is corrected using a sledgehammer with a piece of wood under it. This is necessary, first of all, so that the stones fit as closely as possible to the base, and water cannot seep under them, because when frosts begin, it will expand and raise the components of the path. The wide joints between the trail elements must be filled with mortar.
Garden paths made of natural stone in your garden are a unique opportunity to endow your landscape with the desired features in an unusual and colorful way.
The ability not to deform with sudden changes in temperature.
The layout of the garden path Depending on the purpose of the area paved with natural stone (parking for a car, recreation area, walking paths), the preparation of the base for the paths changes. The base can be gravel-sand, sand or concrete with reinforcement. For the sake of safety and strength of the surface, driveways and areas are made on a concrete screed or reinforced base.
Tracks are usually laid on gravel if the soil is clayey or prone to heaving.
Features of fiber: increases resistance to various mechanical influences; reinforces the solution in all sorts of directions; forms a homogeneous mass.
When laying the path on a sand cushion, the size of the joints between the flagstone should not be more than 2 cm.
A greasy solution (thick) will be difficult to distribute in the formwork, while a liquid solution will crack during the drying process. So don't go to extremes. In order to prepare the solution with high quality, you can use a portable concrete mixer. If one is not available, and the total area of \u200b\u200bthe tracks is not very large, you can use a sufficiently powerful perforator (with low speed), using a mixer attachment designed for mixtures of a loose nature.
The suburban path must be made reliable and beautiful. In this case, the material used for the construction of the track plays an essential role.
Using sticks and a laser level, measure out how many steps are needed to achieve the required height. You can use a circular saw to cut stones for steps. A tool with a 14 ”diamond blade can cut stones up to 10 cm thick, but this blade cannot handle stones 15 cm thick. To break such stones, use a sledgehammer and wedges.
Although natural stone for tracks, the price is considerable, the process of laying it will take time, especially if your ornaments are large and complex, believe me, the end result will exceed all your expectations and hopes. After completing all the work, you will receive an amazingly beautiful, original canvas, distinguished by its strength and resistance to weather conditions.
Here, as in everything, there are disadvantages:
Also, for paths that are intended for cars, a concrete base is installed and joints are provided with a special solution. Before starting work, it is necessary to mark and dig a depression of 20-30 cm. Then the bottom is tamped, a layer of dolomite, pebbles or gravel is poured, which is soaked and tamped again. Next, you need to fill the recess with hard concrete and level it. In order to save concrete, you can create a base of fine stone 15-20 cm thick.
For clayey soils prone to heaving, it is better to use the second method, with a gravel pad. The depth of the bed for this method is made 20-30 cm more than the thickness of the stone. The stone thickness for such paths can be reduced to 30 mm for gray flagstone and up to 40-50 mm for light varieties of limestone (yellow, white, orange, beige). A layer of sand is poured to the bottom, and crushed stone (gravel) in equal amounts on top. After that, it is necessary to carefully tamp the base of the future garden path, carefully shed and tamp it again.
When preparing the solution, you can add fiberglass or water-repellent additives to the mixture. And to increase the strength of the pavement slab, crushed stone can be used as an additive to the concrete solution.
Sand laying is the easiest way. In the case of this method, a thick flagstone (5-8 cm) of large size should be used. In the ground, a bed is arranged under the future track 5 cm deep more than the thickness of the stone used. At the bottom, it is necessary to pour a layer of sand 5 cm thick, carefully level it, spill it with water and tamp it. Stones should be placed on the sand end to end. The thickness of the seams is 1-2 cm. The seams are filled with sand to the top and spilled with water. This option is very good for garden paths, as it does not require a large excavation of land, and the risk of damage to plant roots is minimized. However, this method cannot be used in the case of clay soil prone to heaving. After frost due to water lenses, the track on such soil can warp and lose its presentable appearance.
In order to prepare a solution, dry components are poured into water and mixed until a homogeneous state is achieved. If mixing was carried out mechanically, the strength of the concrete coating increases. Lower strength is typical when mixing concrete with a shovel by hand.
Before you buy a natural stone for a garden path, you need to decide on the technology of paving. Today, there are three main options for the execution of stone paths: laying sandstone on sand, paving a path on a gravel bed, facing a concrete base.
- If you are laying not a flat path, but steps, be sure to make sure that their device is correct and reliable. Each stone step must be perfect, otherwise it can disrupt the entire structure. When the path is completely ready, you can start improving the space around it. Natural stone does not need clear boundaries, so nothing can be specially planted around it. Everything here is purely individual.
- The price of colored pebbles is quite high;
In the process of paving garden paths, the following types of stone are used: slate, sandstone, shungite, granite, gabbro, dolomite limestone, quartzite and others.
1LandscapeDesign.ru
After that, you can start the paving process. All elements must be laid on a layer of mortar with a thickness of about 3 cm and leveled with a wooden mallet. The sections of the path 60-70 cm long are insulated with intervals in the form of expansion joints across the path. The thickness of the seams is 1-5 cm. Later, after the completion of the work and the hardening of the mortar, these seams are filled with fine gravel screenings or sand (if the seams are small), or soil, followed by sowing the grass (if the seams are wide). The type of seam, of course, must be selected in advance. Ordinary, non-expansion joints should be filled with mortar.
At the next stage of work, we pour concrete mortar into the formwork. In order for the distribution to be uniform (in the absence of a special vibrator), it is necessary to use a spatula or other suitable tool for this purpose. When distributing, you need to create artificial vibration and puncture the concrete mix. Or tap on the formwork or reinforcing layer. This is done for a more thorough compaction and exclusion of the formation of air voids in the concrete solution.
Method one: on a sand base
Tracks are usually laid on gravel if the soil is clayey or prone to heaving.
Features of fiber: increases resistance to various mechanical influences; reinforces the solution in all sorts of directions; forms a homogeneous mass.
When laying the path on a sand cushion, the size of the joints between the flagstone should not be more than 2 cm.
Method two: on a concrete base
Let's dwell on the two simplest and not very laborious types of laying a garden path with our own hands. To begin with, you should make a markup, for this, on a site cleared of debris, stones, weeds, you should hammer in the pegs and pull the rope along the line of the future path. Such marking will greatly simplify the further work on laying the stone. Then, according to the shape of the future path, the sod and soil are selected with a shovel to a depth of 5 to 15 cm. The resulting excavation is covered with crushed stone, slag, fighting and carefully trampled down, tamped. A bedding is poured on top of the crushed stone - sand, which is also well compacted. Then a layer of concrete should be laid - if in the future this path will be driven by a car or bicycle. Even if such a load is not expected, this layer will still give strength and durability, but you can do without this by placing the material directly on the sand layer. This type of coating will take significantly less time and effort, and will also be less costly.
The most interesting options on the topic of garden paths made of natural stone, how to choose, we lay garden paths made of natural stone correctly.
You still have to spend money to bring it to your site; Natural flagstone for paving a garden path The most economical and natural material for creating paths is flagstone - a torn, unordered natural stone. Also used are flat slabs of sandstone of various shades, shungite, quartzite, dolomite, siltstone shale. The average level of slab thickness depends on the specific type of stone (range from 10 to 70 mm).
Source
A simple and highly artistic way of laying the track
24 hours after laying, when the cement has hardened, but has not yet gained strength, the stone must be poured with water and thoroughly cleaned from the mortar using a metal brush. In addition, it is recommended to cover light varieties of limestone with a special repulsive impregnation for stone, which will provide protection from water and dust.
1stones.ru
Now you need to make the final alignment of the top layer. For this case, we use a flat board or such a tool as a rule. The board or rule rests on the edges of the wooden formwork, after which movements (regardless of the shape of the path) are performed in the direction along the path. It is necessary to fill it in stages, from one separator to another.

For clayey soils prone to heaving, it is better to use the second method, with a gravel pad. The depth of the bed for this method is made 20-30 cm more than the thickness of the stone. The stone thickness for such paths can be reduced to 30 mm for gray flagstone and up to 40-50 mm for light varieties of limestone (yellow, white, orange, beige). A layer of sand is poured to the bottom, and crushed stone (gravel) in equal amounts on top. After that, it is necessary to carefully tamp the base of the future garden path, carefully shed and tamp it again.

When preparing the solution, you can add fiberglass or water-repellent additives to the mixture. And to increase the strength of the pavement slab, crushed stone can be used as an additive to the concrete solution.
Sand laying is the easiest way. In the case of this method, a thick flagstone (5-8 cm) of large size should be used. In the ground, a bed is arranged under the future track 5 cm deep more than the thickness of the stone used. At the bottom, it is necessary to pour a layer of sand 5 cm thick, carefully level it, spill it with water and tamp it. Stones should be placed on the sand end to end. The thickness of the seams is 1-2 cm. The seams are filled with sand to the top and spilled with water. This option is very good for garden paths, as it does not require a large excavation of land, and the risk of damage to plant roots is minimized. However, this method cannot be used in the case of clay soil prone to heaving. After frost due to water lenses, the track on such soil can warp and lose its presentable appearance.

Back to the table of contents
- The suburban path must be made reliable and beautiful. In this case, the material used for the construction of the track plays an essential role.
- The need for a preliminary outline of the desired drawing and its calculations;
- Natural flagstones are most popular in the paving process because they are relatively cheap compared to other materials, have a smooth rough surface and a wide range of stone thicknesses. All this contributes to the convenience and practicality of use, and also allows the use of natural stone flagstone under different loads.
- Garden path ideas
- The scheme of laying natural stone on a sand-cement mortar.
- After the concrete solution is finally poured, there is a need to cover the path with polyethylene. This will protect the concrete slabs of the walkway from the effects of rain and an overly quick drying process. After all, the longer the solution is wet, the higher qualities of strength your track will have.
- After that, you can start the paving process. All elements must be laid on a layer of mortar with a thickness of about 3 cm and leveled with a wooden mallet. The sections of the path 60-70 cm long are insulated with intervals in the form of expansion joints across the path. The thickness of the seams is 1-5 cm. Later, after the completion of the work and the hardening of the mortar, these seams are filled with fine gravel screenings or sand (if the seams are small), or soil, followed by sowing the grass (if the seams are wide). The type of seam, of course, must be selected in advance. Ordinary, non-expansion joints should be filled with mortar.
- At the next stage of work, we pour concrete mortar into the formwork. In order for the distribution to be uniform (in the absence of a special vibrator), it is necessary to use a spatula or other suitable tool for this purpose. When distributing, you need to create artificial vibration and puncture the concrete mix. Or tap on the formwork or reinforcing layer. This is done for a more thorough compaction and exclusion of the formation of air voids in the concrete solution.
- Tracks are usually laid on gravel if the soil is clayey or prone to heaving.
- Layout of natural stone on a sandy base with grass in the seams
- Back to the table of contents
- Slow, laborious process of laying out the pattern.
- Also, a coating of externally torn natural stone creates an additional decorative effect. To create garden paths, flagstone with a thickness of 3 to 6 cm is used, and a thinner material is needed for facing work.
The third version of the device for a garden path is universal and is used both for regular areas and paths, and for a blind area around the house. The concrete base is cast in the formwork in the usual way, with reinforcement. The thickness of the concrete base should be 15-20 cm. A gravel pad is required, as in the second option, because in addition to softening the forces of heaving of the soil, the pillow also performs the function of drainage. When using concrete, the stone performs the function of facing and does not experience significant bending loads. In view of this, the thickness of the stone may be even less than in the second version, but not less than 2-3 cm for gray sandstone and 4 cm for light sandstone.
STONE PAVING TECHNOLOGY
Source

24 hours after laying, when the cement has hardened, but has not yet gained strength, the stone must be poured with water and thoroughly cleaned from the mortar using a metal brush. In addition, it is recommended to cover light varieties of limestone with a special repulsive impregnation for stone, which will provide protection from water and dust.
Now you need to make the final alignment of the top layer. For this case, we use a flat board or such a tool as a rule. The board or rule rests on the edges of the wooden formwork, after which movements (regardless of the shape of the path) are performed in the direction along the path. It is necessary to fill it in stages, from one separator to another.

For clayey soils prone to heaving, it is better to use the second method, with a gravel pad. The depth of the bed for this method is made 20-30 cm more than the thickness of the stone. The stone thickness for such paths can be reduced to 30 mm for gray flagstone and up to 40-50 mm for light varieties of limestone (yellow, white, orange, beige). A layer of sand is poured to the bottom, and crushed stone (gravel) in equal amounts on top. After that, it is necessary to carefully tamp the base of the future garden path, carefully shed and tamp it again.
This method of constructing the path provides for a base only of sand, without the use of concrete. Prepared slabs are tightly laid on a layer of sand, and then fixed with cement mortar. Plates should be laid tightly and slightly pressed into the sand, you can use a mallet for this. It is not at all difficult to prepare a cement solution with your own hands, you just need to observe the proportions. In this case, the solution is prepared at the rate of 1 part of cement, 3 parts of sand and a lot of water, since the solution will have to be poured into the gaps between the plates. It is desirable that the seams are flush with the slabs, not convex or depressed. They should be carefully aligned flush with the surface of the track, using a trowel or metal spatula for this.
Before you buy a natural stone for a garden path, you need to decide on the technology of paving.
Granite is one of the most durable and wind-resistant materials that does not react to high humidity and cold.

Granite Paving Stone Granite paving stone is also widely used to create garden paths. This material is expensive, beautiful and durable, intended for paving driveways and paths. The geometric shape of this natural stone allows it to be laid in various ways, as well as to create patterns, compositions or spatial figures.
GARDEN WAYS FROM NATURAL STONE: HOW TO MAKE YOURSELF

In all three methods, a slope angle of approximately 3 degrees must be observed, which will ensure water drainage.
Garden path ideas
The scheme of laying natural stone on a sand-cement mortar.
After the concrete solution is finally poured, there is a need to cover the path with polyethylene. This will protect the concrete slabs of the walkway from the effects of rain and an overly quick drying process. After all, the longer the solution is wet, the higher qualities of strength your track will have.

After that, you can start the paving process. All elements must be laid on a layer of mortar with a thickness of about 3 cm and leveled with a wooden mallet. The sections of the path 60-70 cm long are insulated with intervals in the form of expansion joints across the path. The thickness of the seams is 1-5 cm. Later, after the completion of the work and the hardening of the mortar, these seams are filled with fine gravel screenings or sand (if the seams are small), or soil, followed by sowing the grass (if the seams are wide). The type of seam, of course, must be selected in advance. Ordinary, non-expansion joints should be filled with mortar.
Back to the table of contents
Today, there are three main options for the execution of stone paths: laying sandstone on sand, paving a path on a gravel bed, facing a concrete base.
When paving paths with natural stone, you can use both granite and shungite, quartz, slate, sandstone. Granite has a very wide range of colors: from pale gray to red shades. Very often, chipped paving stones, boulders, flagstones and cobblestones are used for paving paths. Maybe try different variants to combine shades, come up with an extraordinary drawing. Everything will depend only on your imagination.
THE ADVANTAGES OF A STONE GARDEN PATH
The most durable paving stones are obtained from quartzite, sandstone or granite. It looks like full-sawn, chipped and sawn-chipped.

It is best to buy a stone for a garden path with a reserve.
Http://viktortapok.blogspot.com/2012/03/blog-post_18.html Keywords: garden.ideas
The third version of the device for a garden path is universal and is used both for regular areas and paths, and for a blind area around the house. The concrete base is cast in the formwork in the usual way, with reinforcement. The thickness of the concrete base should be 15-20 cm. A gravel pad is required, as in the second option, because in addition to softening the forces of heaving of the soil, the pillow also performs the function of drainage. When using concrete, the stone performs the function of facing and does not experience significant bending loads. In view of this, the thickness of the stone may be even less than in the second version, but not less than 2-3 cm for gray sandstone and 4 cm for light sandstone.
Source
- 24 hours after laying, when the cement has hardened, but has not yet gained strength, the stone must be poured with water and thoroughly cleaned from the mortar using a metal brush. In addition, it is recommended to cover light varieties of limestone with a special repulsive impregnation for stone, which will provide protection from water and dust.
- If, nevertheless, the device of the track should provide for a certain margin of safety and durability, you should prepare a concrete solution with your own hands and lay it in a layer of 10-15 cm on top of the compacted sand. Then, slabs of natural material are laid on a layer of concrete, slightly pressing them into the solution, after which, according to the first method, the slits are filled with a solution. After the concrete sets and dries, the device can be considered complete.
- Sand laying is the easiest way. In the case of this method, a thick flagstone (5-8 cm) of large size should be used. In the ground, a bed is arranged under the future track 5 cm deep more than the thickness of the stone used. At the bottom, it is necessary to pour a layer of sand 5 cm thick, carefully level it, spill it with water and tamp it. Stones should be placed on the sand end to end. The thickness of the seams is 1-2 cm. The seams are filled with sand to the top and spilled with water. This option is very good for garden paths, as it does not require a large excavation of land, and the risk of damage to plant roots is minimized. However, this method cannot be used in the case of clay soil prone to heaving. After frost due to water lenses, the track on such soil can warp and lose its presentable appearance.
Creating stone garden paths will require tools and materials such as:
Garden paths made of stone

First of all, you need to calculate the amount of stone, the square and the footage of the track. If you can't calculate, then just pave the layout of the garden path and change it as you work. This way you can arrive at the ideal structure for your garden path. Then this layout will need to be removed and the silhouette of the path on the ground will be drawn.
In all three methods, a slope angle of approximately 3 degrees must be observed, which will ensure water drainage.
Garden path ideas

The scheme of laying natural stone on a sand-cement mortar.
The wood curb goes well with natural stone.
The scheme of laying natural stone on a sand-cement mortar.
Natural natural stone - sandstone, cobblestone, granite, river pebbles, shell rock, the choice of which depends on your ideas, capabilities and desires;
Also created from hard rocks such as gabbro, quartzite, labradorite. These types of stones are more difficult to process due to their high strength, and therefore, they are much less often used for paving garden paths.


 Before laying the trail, the soil must be properly prepared. At the site of the future track, it is necessary to sift the sand and tamp it carefully. The resulting pillow will allow the stones not to fall through and not go sideways.
 Taken from: http://samozvetik.ru/blog/43026119618/DOROZHKA-IZ-...OGO-KAMNYA-SVOIMI-RUKAMI?tmd\u003d1
It is best to buy a stone for a garden path with a reserve.
Http://viktortapok.blogspot.com/2012/03/blog-post_18.html Keywords: garden.ideas
The third version of the device for a garden path is universal and is used both for regular areas and paths, and for a blind area around the house. The concrete base is cast in the formwork in the usual way, with reinforcement. The thickness of the concrete base should be 15-20 cm. A gravel pad is required, as in the second option, because in addition to softening the forces of heaving of the soil, the pillow also performs the function of drainage. When using concrete, the stone performs the function of facing and does not experience significant bending loads. In view of this, the thickness of the stone may be even less than in the second version, but not less than 2-3 cm for gray sandstone and 4 cm for light sandstone.
NATURAL STONE ROADS: MAIN STEPS, MATERIALS AND TOOLS
It is worth noting that the device of the track with your own hands also has small tricks that inexperienced builders do not always take into account.
For clayey soils prone to heaving, it is better to use the second method, with a gravel pad. The depth of the bed for this method is made 20-30 cm more than the thickness of the stone. The stone thickness for such paths can be reduced to 30 mm for gray flagstone and up to 40-50 mm for light varieties of limestone (yellow, white, orange, beige). A layer of sand is poured to the bottom, and crushed stone (gravel) in equal amounts on top. After that, it is necessary to carefully tamp the base of the future garden path, carefully shed and tamp it again.
The tool is chosen taking into account the condition of the stone;
- Thus,
Now you need to deal directly with the material that will be used for paving the path. To do this, you should process all the elements that will be used in the work: remove irregularities, adjust the dimensions, smooth the surface, level, trim. When all the elements fit one to one, they will need to be joined.
- Garden paths made of natural stone on the backyard of a country house or in the country is a necessity that most homeowners remember last. And this is absolutely wrong, because the paths at the summer cottage and, even more so, in the place of permanent residence are a very important component of the improvement of the site.
- First of all, you need to calculate the amount of stone, the square and the footage of the track. If you can't calculate, then just pave the layout of the garden path and change it as you work. This way you can arrive at the ideal structure for your garden path. Then this layout will need to be removed and the silhouette of the path on the ground will be drawn.
- Published by Lyudmila Vyatysheva,
- In all three methods, a slope angle of approximately 3 degrees must be observed, which will ensure water drainage.
- Firstly, so that the track from exploitation and weather conditions does not creep over time, it should be edged, moreover, good option the border will be both natural stone and wood.
- After that, you can start the paving process. All elements must be laid on a layer of mortar with a thickness of about 3 cm and leveled with a wooden mallet. The sections of the path 60-70 cm long are insulated with intervals in the form of expansion joints across the path. The thickness of the seams is 1-5 cm. Later, after the completion of the work and the hardening of the mortar, these seams are filled with fine gravel screenings or sand (if the seams are small), or soil, followed by sowing the grass (if the seams are wide). The type of seam, of course, must be selected in advance. Ordinary, non-expansion joints should be filled with mortar.
- Cement mortar, wooden blocks, crushed stone and sand;
- Garden paths made of natural stone
- Before laying stones on the sand, it must be tamped.
- Even if we do not take into account the aesthetic component, the functional and hygienic ones remain. After all, any area of \u200b\u200bopen ground is dirt and earth, and it is very inconvenient to carry kilograms of this dirt into the house every time you walk through your area, and then wash your shoes and floors. So garden paths made of stone are a very important part of suburban life. A path made of natural stone is able to decorate any suburban area.
Before laying the trail, the soil must be properly prepared. At the site of the future track, it is necessary to sift the sand and tamp it carefully. The resulting pillow will allow the stones not to fall through and not go sideways.
STONE PAVING TECHNOLOGY
Taken from: http://samozvetik.ru/blog/43026119618/DOROZHKA-IZ-...OGO-KAMNYA-SVOIMI-RUKAMI?tmd\u003d1
It is best to buy a stone for a garden path with a reserve.
Secondly, the canvas should be slightly convex and protrude above the soil level or have a slope. This is necessary so that the water does not stagnate and does not destroy the web, in addition, moisture deteriorates the performance characteristics. If marble is used (a rather rare phenomenon), then moisture makes it slippery and dangerous.
24 hours after laying, when the cement has hardened, but has not yet gained strength, the stone must be poured with water and thoroughly cleaned from the mortar using a metal brush. In addition, it is recommended to cover light varieties of limestone with a special repulsive impregnation for stone, which will provide protection from water and dust.
Metal mesh;
Create an individual flavor at the summer cottage and allow you to aesthetically complement the landscape design.
The joining of stones is like laying out a mosaic, only on the ground and out of stone. If something does not work out for you, the size can be adjusted artificially - using a grinder (grinder) on a stone. However, this entails additional material costs and is therefore not very profitable. As a result, it can easily turn out not what you planned for the layout before starting work.
Garden paths are made of natural and artificial stone. The easiest way is to use ready-made natural stones, if available.
GARDEN WAYS FROM NATURAL STONE: HOW TO MAKE YOURSELF
Now you need to deal directly with the material that will be used for paving the path. To do this, you should process all the elements that will be used in the work: remove irregularities, adjust the dimensions, smooth the surface, level, trim. When all the elements fit one to one, they will need to be joined.
Garden paths made of natural stone on the backyard of a country house or in the country is a necessity that most homeowners remember last. And this is absolutely wrong, because the paths at the summer cottage and, even more so, in the place of permanent residence are a very important component of the improvement of the site.
First of all, you need to calculate the amount of stone, the square and the footage of the track. If you can't calculate, then just pave the layout of the garden path and change it as you work. This way you can arrive at the ideal structure for your garden path. Then this layout will need to be removed and the silhouette of the path on the ground will be drawn.
Back to the table of contents
The third version of the device for a garden path is universal and is used both for regular areas and paths, and for a blind area around the house. The concrete base is cast in the formwork in the usual way, with reinforcement. The thickness of the concrete base should be 15-20 cm. A gravel pad is required, as in the second option, because in addition to softening the forces of heaving of the soil, the pillow also performs the function of drainage. When using concrete, the stone performs the function of facing and does not experience significant bending loads. In view of this, the thickness of the stone may be even less than in the second version, but not less than 2-3 cm for gray sandstone and 4 cm for light sandstone.
Trowel;
Also, in some detail about the use of natural stone is described in the videos on the paving of garden paths, which are posted on our website.
THE ADVANTAGES OF A STONE GARDEN PATH
When all the stones are joined and laid out, all that remains is to close up the seams so that the stone path will last as long as possible. The mortar can be prepared not only from a simple and well-known mixture of sand and cement, but also from a mixture of sand and marble chips.
To make a garden path from stone, you must perform the following work:
Before laying stones on the sand, it must be tamped.
Even if we do not take into account the aesthetic component, the functional and hygienic ones remain. After all, any area of \u200b\u200bopen ground is dirt and earth, and it is very inconvenient to carry kilograms of this dirt into the house every time you walk through your area, and then wash your shoes and floors. So garden paths made of stone are a very important part of suburban life. A path made of natural stone is able to decorate any suburban area.
Before laying the trail, the soil must be properly prepared. At the site of the future track, it is necessary to sift the sand and tamp it carefully. The resulting pillow will allow the stones not to fall through and not go sideways.
The second option is less picky about some material. Garden paths created according to this principle look very picturesque and original. Their design requires more artistic taste than construction skills. In order for the installation to look harmonious with the surrounding space, you must first select the appropriate material. Large slabs of natural stone are best suited for this method. They put it directly on the turf, use a shovel to mark the contour, remove the slab and dig a hole approximately equal in depth to the thickness of the stone slab. Then a layer of sand is poured into it so that the laying is even, and the slab is put in place. Lined with a chain, broken line, such garden paths made of natural stone will impress any of the guests as a highly artistic work.
- In all three methods, a slope angle of approximately 3 degrees must be observed, which will ensure water drainage.
- For laying - a wooden hammer.
- Popular Chinese wisdom says that all roads lead to those who built them. It can be said with the same confidence that all roads and paths can tell a lot about their creators, especially if these are paths built with my own hands in his suburban area. They will talk about the inventiveness of the owners, their imagination, patience and the ability to handle various natural and artificially created building materials.
After finishing the sealing and drying of the joints, the path is ready.
SOLUTION FOR GARDEN PATH. COOKING RULES
You will need pegs and rope to mark the path.
The joining of stones is like laying out a mosaic, only on the ground and out of stone. If something does not work out for you, the size can be adjusted artificially - using a grinder (grinder) on a stone. However, this entails additional material costs and is therefore not very profitable. As a result, it can easily turn out not what you planned for the layout before starting work.
Garden paths are made of natural and artificial stone. The easiest way is to use ready-made natural stones, if available.
Now you need to deal directly with the material that will be used for paving the path. To do this, you should process all the elements that will be used in the work: remove irregularities, adjust the dimensions, smooth the surface, level, trim. When all the elements fit one to one, they will need to be joined.
Garden paths made of natural stone on the backyard of a country house or in the country is a necessity that most homeowners remember last. And this is absolutely wrong, because the paths at the summer cottage and, even more so, in the place of permanent residence are a very important component of the improvement of the site.
Back to the table of contents
At the beginning of any work, some preparation is required. But it should be noted that if you have chosen such a material as pebbles, then additional preparation is not needed for it, it is enough to sort by color and size. Often these procedures are done before laying out the pebble patterns with your own hand.
How to make an original track in sadvideo
Paving a garden path made of stone with your own hands allows you to save the developer's money and makes it possible to feel like a real designer of your land plot. Moreover, this process is not as responsible and complicated as, for example, building a house.
Create a markup on the site. If you want to make a straight path out of stone, you can mark it with pegs and rope. If the garden path made of stone is winding, then a lot of rope and pegs will be needed to mark it. The standard width of such tracks is 80 cm.
When all the stones are joined and laid out, all that remains is to close up the seams so that the stone path will last as long as possible. The mortar can be prepared not only from a simple and well-known mixture of sand and cement, but also from a mixture of sand and marble chips. To make a garden path from stone, you must perform the following work:
Before laying stones on the sand, it must be tamped.
Even if we do not take into account the aesthetic component, the functional and hygienic ones remain. After all, any area of \u200b\u200bopen ground is dirt and earth, and it is very inconvenient to carry kilograms of this dirt into the house every time you walk through your area, and then wash your shoes and floors. So garden paths made of stone are a very important part of suburban life. A path made of natural stone is able to decorate any suburban area.
First of all, you need to calculate the amount of stone, the square and the footage of the track. If you can't calculate, then just pave the layout of the garden path and change it as you work. This way you can arrive at the ideal structure for your garden path. Then this layout will need to be removed and the silhouette of the path on the ground will be drawn.
NATURAL STONE ROADS: MAIN STEPS, MATERIALS AND TOOLS
In the process of working with cobblestone, flat slabs or wild stone, there is a need to split some fragments or cut them in order to get the desired shape and size. To carry out these works, you may need different tools and devices.
When making paths in the country or in the garden, you can use a wide variety of materials. For example: simple gravel, sandstone and flagstone, granite, paving stones, multi-colored pebbles, using which you can achieve complex, beautiful patterns.
- The layout of the path must be laid out in advance, so that later you do not pick up suitable pieces of stones.
- Choose the right material. There are many materials available on the market today that can be used to construct tracks. It all depends on your financial capabilities, conditions of the land.
After finishing the sealing and drying of the joints, the path is ready.
- You will need pegs and rope to mark the path.
- The joining of stones is like laying out a mosaic, only on the ground and out of stone. If something does not work out for you, the size can be adjusted artificially - using a grinder (grinder) on a stone. However, this entails additional material costs and is therefore not very profitable. As a result, it can easily turn out not what you planned for the layout before starting work.
- Garden paths are made of natural and artificial stone. The easiest way is to use ready-made natural stones, if available.
- Types of natural stones
- Note that this work is rather lengthy and not easy. Many will give preference to purchasing an already prepared laying stone.
- Today, natural stone paths are at a high level of popularity, because all the elements of their patterns are unique and diverse, have unique shapes and shades. The pattern is obtained due to the fact that natural stone is laid by pressing it into the solution. Thus, the base is almost invisible, and the pattern stands out well in the glitter of the sun's rays or the glow of the moonlight.
- The garden path can be paved on a cement or concrete base. In addition to natural material, you can use paving slabs, paving stones, clinker bricks, decking, artificial stone, concrete using a special shape, composite board.
- The main thing is to decide on the paving scheme of the paths before starting work, whitening the main destinations to which these paths should lead. Such points can be: lawns and flower beds, wings and gazebos, artificial ponds and alpine slides, barbecue areas and technical facilities, children's sandboxes.
- Lay the cover. This stage of the construction of a garden path made of stone completely depends on the material chosen.
- Paving a garden path made of stone with your own hands allows you to save the developer's money and makes it possible to feel like a real designer of your land plot. Moreover, this process is not as responsible and complicated as, for example, building a house.
- Create a markup on the site. If you want to make a straight path out of stone, you can mark it with pegs and rope. If the garden path made of stone is winding, then a lot of rope and pegs will be needed to mark it. The standard width of such tracks is 80 cm.
When all the stones are joined and laid out, all that remains is to close up the seams so that the stone path will last as long as possible. The mortar can be prepared not only from a simple and well-known mixture of sand and cement, but also from a mixture of sand and marble chips.
STONE PAVING TECHNOLOGY
To make a garden path from stone, you must perform the following work:
Before laying the trail, the soil must be properly prepared. At the site of the future track, it is necessary to sift the sand and tamp it carefully. The resulting pillow will allow the stones not to fall through and not go sideways.
When arranging garden paths, it is advised to process the top layer of the stone with substances that will protect and prevent them from cracking, which is possible with temperature changes. Processing should take place the first time before laying, and the subsequent ones - annually. Substances for processing stone are purchased in stores specializing in construction.
In order to build a natural stone path with your own hands, you don't need a lot:
The modern solution to the design of the track is a geogrid, i.e. planting shallow grass between structural elements.
Gravel;
The width of the garden paths is usually made so that the garden cart can easily pass. Depending on the type of trail, it is done without or with a border. The track can be at or above the ground level. The first option is more convenient in everyday life, the second is more convenient in terms of cleaning - less soil is applied to it.
To make a garden path from stone you will need following materials and tools:
The layout of the path must be laid out in advance, so that later you do not pick up suitable pieces of stones.
Choose the right material. There are many materials available on the market today that can be used to construct tracks. It all depends on your financial capabilities, conditions of the land.
GARDEN WAYS FROM NATURAL STONE: HOW TO MAKE YOURSELF
After finishing the sealing and drying of the joints, the path is ready.
You will need pegs and rope to mark the path.
Now you need to deal directly with the material that will be used for paving the path. To do this, you should process all the elements that will be used in the work: remove irregularities, adjust the dimensions, smooth the surface, level, trim. When all the elements fit one to one, they will need to be joined.
Next, consider the options for paving paths with natural stone in your garden. Of course, this work can be done with your own hands, spending a certain amount of time and effort. First of all, you should choose what kind of stone you will work with, then sketch out a sketch of the future drawing.
Natural natural stone (today, laying is often done from colored pebbles),
To make the paving of the garden path as simple and convenient as possible, adhere to the following recommendations:
Cement;
The garden path can be paved on a cement or concrete base. In addition to natural material, you can use paving slabs, paving stones, clinker bricks, decking, artificial stone, concrete using a special shape, composite board.
THE ADVANTAGES OF A STONE GARDEN PATH
Styling material (in our case, natural stone);
The main thing is to decide on the paving scheme of the paths before starting work, whitening the main destinations to which these paths should lead. Such points can be: lawns and flower beds, wings and gazebos, artificial ponds and alpine slides, barbecue areas and technical facilities, children's sandboxes.
Lay the cover. This stage of the construction of a garden path made of stone completely depends on the material chosen.
Paving a garden path made of stone with your own hands allows you to save the developer's money and makes it possible to feel like a real designer of your land plot. Moreover, this process is not as responsible and complicated as, for example, building a house.
Create a markup on the site. If you want to make a straight path out of stone, you can mark it with pegs and rope. If the garden path made of stone is winding, then a lot of rope and pegs will be needed to mark it. The standard width of such tracks is 80 cm.
The joining of stones is like laying out a mosaic, only on the ground and out of stone. If something does not work out for you, the size can be adjusted artificially - using a grinder (grinder) on a stone. However, this entails additional material costs and is therefore not very profitable. As a result, it can easily turn out not what you planned for the layout before starting work.
Consider the procedure for working with a wild stone on a sand and gravel base on sandy soils.
- A sketch of the pattern you want to reproduce,
- Lay out the place. For a natural look, it is necessary to plan the contours of the site, with a patio out of the blue and steps on a cut hillside if any. Dig up the area. Any vegetation in the path must be removed. The area must be carefully cleared. Stone slabs 10 cm thick are laid on a base of 10 cm thick gravel layer.
- Sand;
The modern solution to the design of the track is a geogrid, i.e. planting shallow grass between structural elements.
Gravel;
The width of the garden paths is usually made so that the garden cart can easily pass. Depending on the type of trail, it is done without or with a border. The track can be at or above the ground level. The first option is more convenient in everyday life, the second is more convenient in terms of cleaning - less soil is applied to it.
SOLUTION FOR GARDEN PATH. COOKING RULES
To make a garden path out of stone, you will need the following materials and tools:
The layout of the path must be laid out in advance, so that later you do not pick up suitable pieces of stones.
Choose the right material. There are many materials available on the market today that can be used to construct tracks. It all depends on your financial capabilities, conditions of the land.
When all the stones are joined and laid out, all that remains is to close up the seams so that the stone path will last as long as possible. The mortar can be prepared not only from a simple and well-known mixture of sand and cement, but also from a mixture of sand and marble chips.
So, we immediately prepare the soil. We make markings along the side of the path using pre-prepared wooden pegs and rope. We remove growing weeds. Remove the top layer of soil. Sort the material selected for work, based on the data of the sketched sketch. We do this as previously agreed - in color and size. The next step is to fill the territory of the future track with a twenty-centimeter layer of sand. We tamp. After that, we put a fifteen-centimeter layer of gravel.
Cement mortar, sand, gravel,
Thin, lightweight slabs such as sandstone often require a rock dust base mixed with cement to ensure the best possible fit. Pack the gravel thoroughly. When the tamping is complete, the base will be smooth and firm, ready for natural stone installation.
Wooden boards;
To make the paving of the garden path as simple and convenient as possible, adhere to the following recommendations:
Cement;
The garden path can be paved on a cement or concrete base. In addition to natural material, you can use paving slabs, paving stones, clinker bricks, decking, artificial stone, concrete using a special shape, composite board.
Styling material (in our case, natural stone);
The main thing is to decide on the paving scheme of the paths before starting work, whitening the main destinations to which these paths should lead. Such items can be: lawns and flower beds, wings and gazebos, artificial ponds and alpine slides, barbecue areas and technical facilities, children's sandboxes. Lay the cover. This stage of the construction of a garden path made of stone completely depends on the material chosen.
After finishing the sealing and drying of the joints, the path is ready.
Do-it-yourself natural stone path - we build correctly
Next, we begin the most creative process. We put the stone in a layer of cement mortar with our own hands. After the "mosaic" has been assembled, rub all the joints between the stones with cement mortar and leave to dry.

A little strength, patience and a certain amount of time.

NATURAL STONE ROADS: MAIN STEPS, MATERIALS AND TOOLS
The elements can be combined if desired. Before placing the stones in place of the walkway, arrange them in a dry place in order, combining chips and cuts. It takes much less time than cutting and leveling all the ribs. When laying the material, it must be checked with a level.
Kneading container;

Lay out the place. For a natural look, it is necessary to plan the contours of the site, with a patio out of the blue and steps on a cut hillside if any. Dig up the area. Any vegetation in the path must be removed. The area must be carefully cleared. Stone slabs 10 cm thick are laid on a base of 10 cm thick gravel layer.
- Sand;
- The modern solution to the design of the track is a geogrid, i.e. planting shallow grass between structural elements.
- Gravel;
The width of the garden paths is usually made so that the garden cart can easily pass. Depending on the type of trail, it is done without or with a border. The track can be at or above the ground level. The first option is more convenient in everyday life, the second is more convenient in terms of cleaning - less soil is applied to it.
- To make a garden path out of stone, you will need the following materials and tools:
- Back to the table of contents
- To give greater rigidity and density to the stone garden path, you can strengthen it with reinforcement with metal mesh. If you decide to do this, then the mesh should be mounted in a cement mortar. Such reinforcement can be omitted if a large stone is selected for work. This method is mainly recommended for paving fairly wide paths, large areas, especially when there is an increased content of groundwater in the soil.
- The paths in the garden, lined with natural stone, cannot be compared with all the others. The difference between them is not only in the external charm, but also in the specifics of the styling product, the duration of operation and in strength (such tracks do not deform even under the weight of the car).
- Incorrect inclination of stones is corrected using a sledgehammer with a piece of wood under it. This is necessary, first of all, so that the stones fit as closely as possible to the base, and water cannot seep under them, because when frosts begin, it will expand and raise the components of the path. The wide joints between the trail elements must be filled with mortar.
- Cord;
- Thin, lightweight slabs such as sandstone often require a rock dust base mixed with cement to ensure the best possible fit. Pack the gravel thoroughly. When the tamping is complete, the base will be smooth and firm, ready for natural stone installation.
- Wooden boards;
- To make the paving of the garden path as simple and convenient as possible, adhere to the following recommendations:
- Cement;
- The garden path can be paved on a cement or concrete base. In addition to natural material, you can use paving slabs, paving stones, clinker bricks, decking, artificial stone, concrete using a special shape, composite board.
- Styling material (in our case, natural stone);
The process of laying a limestone walkway.
STONE PAVING TECHNOLOGY
Laying natural stone on a concrete base can be done in several ways.

This is a fairly strong and reliable structure. They are not adversely affected by mechanical influences of various types.
Using sticks and a laser level, measure out how many steps are needed to achieve the required height. You can use a circular saw to cut stones for steps. A tool with a 14 ”diamond blade can cut stones up to 10 cm thick, but this blade cannot handle stones 15 cm thick. To break such stones, use a sledgehammer and wedges.

Pegs;
The elements can be combined if desired. Before placing the stones in place of the walkway, arrange them in a dry place in order, combining chips and cuts. It takes much less time than cutting and leveling all the ribs. When laying the material, it must be checked with a level.
Kneading container;
Lay out the place. For a natural look, it is necessary to plan the contours of the site, with a patio out of the blue and steps on a cut hillside if any. Dig up the area. Any vegetation in the path must be removed. The area must be carefully cleared. Stone slabs 10 cm thick are laid on a base of 10 cm thick gravel layer.

Sand;
The modern solution to the design of the track is a geogrid, i.e. planting shallow grass between structural elements.
Gravel;
GARDEN WAYS FROM NATURAL STONE: HOW TO MAKE YOURSELF

Paving a garden path made of stone with your own hands allows you to save the developer's money and makes it possible to feel like a real designer of your land plot. Moreover, this process is not as responsible and complicated as, for example, building a house.
This method is used to create paths, parking zones and exit zones. Preparation consists in creating a layer of sand up to 10 cm thick. The sand is compacted tightly. After laying the stones, the space between them is filled with the same cleaned sand.
The laying plan is as follows:
If you are laying not a flat path, but steps, be sure to make sure that their device is correct and reliable. Each stone step must be perfect, otherwise it can disrupt the entire structure. When the path is completely ready, you can start improving the space around it. Natural stone does not need clear boundaries, so nothing can be specially planted around it. Everything here is purely individual.

Shovel;
Incorrect inclination of stones is corrected using a sledgehammer with a piece of wood under it. This is necessary, first of all, so that the stones fit as closely as possible to the base, and water cannot seep under them, because when frosts begin, it will expand and raise the components of the path. The wide joints between the trail elements must be filled with mortar.
Thin, lightweight slabs such as sandstone often require a rock dust base mixed with cement to ensure the best possible fit. Pack the gravel thoroughly. When the tamping is complete, the base will be smooth and firm, ready for natural stone installation.
THE ADVANTAGES OF A STONE GARDEN PATH
Wooden boards;

To make the paving of the garden path as simple and convenient as possible, adhere to the following recommendations:
Cement;
The main thing is to decide on the paving scheme of the paths before starting work, whitening the main destinations to which these paths should lead. Such points can be: lawns and flower beds, wings and gazebos, artificial ponds and alpine slides, barbecue areas and technical facilities, children's sandboxes.
The second method consists in laying the stone on a cement mortar, it is prepared in the proportion: 1 part of cement to 5 parts of sand.
Prepared soil,
Source
- Rubber hammer;
- Using sticks and a laser level, measure out how many steps are needed to achieve the required height. You can use a circular saw to cut stones for steps. A tool with a 14 ”diamond blade can cut stones up to 10 cm thick, but this blade cannot handle stones 15 cm thick. To break such stones, use a sledgehammer and wedges.
- Pegs;
The elements can be combined if desired. Before placing the stones in place of the walkway, arrange them in a dry place in order, combining chips and cuts. It takes much less time than cutting and leveling all the ribs. When laying the material, it must be checked with a level.
Kneading container;
Lay out the place. For a natural look, it is necessary to plan the contours of the site, with a patio out of the blue and steps on a cut hillside if any. Dig up the area. Any vegetation in the path must be removed. The area must be carefully cleared. Stone slabs 10 cm thick are laid on a base of 10 cm thick gravel layer.
Sand; DIY garden paths from scrap materials DIY garden paths
Do-it-yourself paths in the country
A garden plot with neatly paved paths always speaks of its owner's love for beautiful landscaping. Natural stone is often used for these purposes. It harmonizes so well with any landscape that it has no equal among other materials for the design of paths. Natural stone is a great way to create a unique design, as well as a valuable decorative element that helps to collect all the objects in a summer cottage into a single whole.
Pros and cons of natural stone paths
Roads paved with natural stone always look great. They are able to transform the garden area and highlight the advantages of the surrounding landscape. But natural stone has others advantages, in addition to excellent decorative qualities:
The use of natural stone, of course, has some not particularly pleasant moments:
- When buying material, you will have to spend tidy sum;
- Natural stone pretty massive, therefore, its movement is possible only with the help of transport;
- Before starting to lay the stone, it is necessary to make small projectcontaining a sketch of the future track and specific calculations.
Features of natural stone: comparison with other materials
Natural stone is a unique material created by nature itself. Thanks to this, he has formed some features that noticeably distinguish this product from artificial analogues. You can compare natural stone with other materials by the following criteria as:
The most discussed fact regarding natural stone as a building material is perhaps its cost... The manufacturer estimates such a product is far from cheap. Nevertheless, against the background of other materials for paving roads, natural stone is not so expensive, especially considering its many positive properties. Basically, the cost of such building material always remains unchanged, which cannot be said about other products offered to developers.
As the name implies, natural stone is not created chemically at the enterprise. It is mined in small quarries, and then only sent for processing. This is another distinctive feature of natural stone - to obtain it, you do not need to pollute the environment with industrial waste. Plus, the process of its extraction is not at all complicated and therefore does not require the use of explosives. The natural origin of the stone guarantees that this material environmentally friendly and does not pose a danger to human health. Even during operation, the material does not express absolutely any negative features.
Natural stone is so diverse and unique that this fact is simply amazing. No other enterprise can produce such a unique material. The possibilities of nature are endless - she created millions of stones that are not similar to each other, and they are all beautiful in their own way. Of course, before going on sale, natural stones are processed in the form of cutting and grindinghowever, this does not make them less exclusive. The variety of materials does not stop at the multitude of shapes and textures. In hardware stores, you can find stones of various colors. In terms of the number of assortments, no material can compare with natural stone.
 Despite the high cost, natural stone is very economical way pave garden paths. The main reason for this paradox is that natural material does not spoil and practically does not change over time, thereby eliminating the need for the developer to resume repair work.
Natural stone can actually become ideal option for people who have the opportunity to invest a large amount in construction once in order to forget about problems with roads forever. Many materials differ decent service lifehowever, this creation of nature surpasses them several times.
As already mentioned, in the process of service, natural stone is almost does not change... That is why it is very convenient to use it as a material for paving paths. If we compare natural stone with any other building material in terms of stability and strength, then we can say with confidence that it has no equal.
Even with regular use, such a coating will remain in the same state after several tens, or even hundreds, years. It is important that natural stone does not react at all to impact low or high temperatures. Under their influence, it does not deform and does not crack, which can happen with a material of artificial origin.
Laying paths from natural stone
Paving garden paths natural stone can occur in one of two ways:
- By applying a coating to a sand cushion;
- The method of laying the material on the concrete mix.
Both the first and second technologies are almost identical, however, some distinctive features they do have it.
The sequence of laying natural stone on a sand cushion

The size of the trench, which is pulled out at the initial stage of the technology, is determined by the properties of the soil. The stronger and stronger the earthen layer, the shallower the depth of the "blank" should be. For soft and light soils, this value can reach 50-60 cm. Otherwise, it is recommended not to make a trench deeper than 30 cm.
As for the formation of a sand cushion, it is better if this process occurs in two approaches. The total thickness of the layer to be laid should be about 10-15 cm. Each layer should be tamp well and pour with water.
Laying on concrete
Laying "on concrete" is also carried out in several stages:
- At the level of the boundaries of the future garden path, trench;
- Into it alternately layers of crushed stone and sand are laid;
- Then a formwork is created into which concrete is poured;
- After the mixture has dried, the formwork is removed;
- Falls asleep into the resulting form sand;
- Natural stone is laid on the sandy layer;
- Performed seam treatment in the form of filling them with sand;
- The surface of the track is moistened.
The formwork should be removed only after complete drying of concrete. In order to prevent cracks from appearing on the surface of the solidifying mixture, it is necessary to water it periodically.
In the modern world, the field of production of building materials does not stand still. New technologies for the manufacture of artificial raw materials are increasingly appearing. Nevertheless, natural materials are considered very valuable, since no enterprise has yet managed to surpass their quality. Natural stone is enough expensive pleasure.
However, it is impossible to find a better material for paving paths. It is distinguished by its high strength, durability, and excellent decorative properties. Laying natural stone is not such a complicated process, especially if you study its technology in detail.
Laying paths with stones on a personal plot is no longer a novelty, but a sure way to ennoble the territory for rest with your own hands. The stone path will be a worthy frame for any highlight of your garden - a small pond, a gazebo or a fragrant rose garden. Surprisingly, a path made of paving stones or wild stone always looks like it just left the pages of a fairy tale book. It is not at all difficult to give your garden a drop of magic - we will make a stone path with our own hands!
There are a lot of potential materials for laying an elegant garden alley today. The hand-made path, paved with natural stones, looks, perhaps, more spectacular and more original than the others. To create a cute walkway on your backyard, decide what material you like best. So, you can take as a basis for a garden stone path:
- gravel;
- sandstone;
- flagstone;
- granite;
- paving stones;
- dolomite;
- sea \u200b\u200bpebbles.
The chipped and tiled stones have all the necessary qualities to transform into a stylish garden path. But at the same time, the material has some drawbacks, the most obvious of which is its high cost. However, a long service life, a high percentage of strength, as well as an amazing decorative effect more than compensate for this nuance.
Advantages of natural stone paths
Most often, such paths are built so that you can quickly and easily approach the house. However, given the beauty and simplicity of the idea, stone alleys can be used to decorate a garden or a recreation area. Solid stones will be an excellent company for green lawns, flower beds, rock gardens and other objects of landscape art. It is difficult for natural stone to find a competitive material as the basis for a garden path, since stone is an unsurpassed beauty created as a result of centuries of painstaking work of natural forces.

In addition, there is no reason to doubt the high strength of this natural material. To create an alley in the garden that will last for more than one year, you can safely choose granite, sandstone, paving stones, pebbles. In general, there are many options and everyone will definitely find the material that will suit him. But a preliminary study of the characteristics of this or that stone will not hurt. For example, some natural materials are quite sensitive to the regular changes in climatic conditions. So, shell rock and limestone left in the open air will lose their strength after a while, which will significantly reduce their service life. But garden paths made of wild stone, or dolomite, can be called a model of practicality and durability. This natural multi-texture material is very durable and is also known for its enviable frost and moisture resistance.

But if we omit all the nuances, we must admit that the garden alley, paved with natural stone, looks much more spectacular and attractive than a path made of artificial stone, for example, concrete.
Garden paths made of stone: what to stay at?
It is no secret that the creation of a stone alley on the territory of a personal plot will require substantial financial investments, therefore the end result should demonstrate an unbroken appearance, good quality, reliability and potential for long-term service. This means that the choice of building material must be approached more than responsibly: to study, compare and evaluate the functional, quality and decorative properties of all available stones. The following forms of natural material are considered the most popular for paving garden alleys:
- chipped paving stones. The stone is a mixture of granite and shungite fragments and is notable for its characteristic chipped edges, due to which it has a shape that is as close to rectangular as possible. Working with such tiles is quick and easy;
- flagstone. This material is fragments of various shapes and sizes, the use of which allows you to create a unique and very unusual track;
- sawn stone. It does not reach the buyer immediately. Before it is sawn and polished: as a result, a rectangular stone is obtained, which has an almost smooth front surface;
- cobblestone and boulders. The stones are distinguished by their size: the cobblestone is small, and the boulders are relatively large. These natural gifts are similar to their rounded shape. The rich shading palette of cobblestones and boulders opens up endless prospects for creating unique compositions and original panels.

How to make a stone path with your own hands
The creation of a garden stone alley begins with the designation of its future outlines. The size, shape and quirkiness of the walkway is determined by your needs and desires, so first try to visualize what exactly you want to see on your infield, and then start acting.
You can sketch the bend and shape of the garden alley in different ways:
- apply the contour to the ground with water from a garden hose;
- sprinkle the soil with flour;
- pull the rope over the pegs dug into the ground.
When you have an approximate sketch of your future stone path in front of your eyes, start digging a trench - its minimum depth should be approximately equal to the bayonet of a shovel. Do not rush to throw aside the sod that you will have after the trench is dug. This land can be useful in further work.
Fill the hole in the ground with a layer of pebbles, slag, broken brick or rubble - this will create a drainage layer. The drainage is well compacted, pressing the stones to the ground with force. The second layer, for the creation of which you need wet sand, is also thoroughly tamped.

Methods for paving a garden path with stone
When the drain cushion is ready, it's time to move on to laying the basic natural material. This can be done in three ways.
Method number 1
Place the stones that you picked up for the path on the sandy pillow. Now the fragments of the alley need to be pressed into it with force - for this use a rubber mallet (mallet). Once this task is done, take care of securing the stones. You will need a 3 to 1 mortar of sand and cement. Fill the cement bag that will serve as a cone with a cementing liquid and pour the mortar into the cracks between the fragments of the alley. This method of laying a garden path is considered less expensive, besides, you will not spend very much time and physical strength.

Method number 2
Unlike the first method, the stones are not laid out on sand, but on concrete mortar. Here's how to do it: Prepare a concrete solution and fill the trench with it around the perimeter. In this case, the layer thickness should not be less than 15 cm. Press the stone tiles for the path into the mortar using a mallet. After a while, when the stone and cement bond, it will be necessary to fill up the gaps between the fragments of the alley. This is done in the same way as in the case of laying natural stone on sand - using a cone from a cement bag.

Method number 3
In specialized stores today you can buy material, thanks to which you can refuse to lay a garden stone path on cement. This is geotextile. Dig a trench about 25 - 35 cm deep and remove all roots, pebbles and other debris from its bottom. Carefully compacted soil at the bottom of the trench is covered with rubble, and a piece of non-woven geotextile is laid on top of it. Please note that the edges of the material should remain outside the trench, extending to a length of less than 40 - 50 cm. Pour another layer of gravel on top and compact it well. Now take the edges of the geotextile and overlap the rubble in the trench. That's it - the drainage system for the garden path is ready.
Now about 15 cm of wet sand is poured onto the geotextile canvas, and fragments of the garden path are laid on top, after which they are pressed into the sand using a mallet. The gaps between the stone slabs are filled with sand. Be prepared to wait - natural material can take about 2 weeks to shrink, during which you need to closely monitor the condition of the track. When the individual elements of the path sink into the ground more than the others, they are raised to fill up the required amount of sand. The fragment is then returned to its place and compacted with a rubber mallet.

When you start laying a garden path made of natural material, you should know or remember some of the nuances regarding this simple but time-consuming process. There is no need to rush: otherwise, you will not get the result you expected, and it will be a pity for the time and money spent. So, what needs to be considered when laying a garden path made of natural stone:
- The path you created should end up slightly above ground level. Compliance with this condition will not allow the slabs of the path to "sour" in water - excess liquid will freely pass through the drainage layer of gravel and sand, being absorbed by the earth. High-quality drainage is the key to a strong and indestructible structure for many years.
- It is advised to equip the finished track with a border of the same natural stone - you will find the blanks in a specialized store. This device will protect the stone slabs from spreading and preserve the original appearance of the alley for a long time.
- Discard the idea of \u200b\u200bpaving your garden path with marble, as moisture and low temperatures make this material extremely slippery.

Pebbles - natural stone for paths
Smooth pebbles kissed by the sea are considered one of the most successful materials for creating a stone path in the garden. The results of self-paving pebbles will exceed all your expectations! Non-triviality and originality - these are the fundamental features of the garden pebble alley.
Pebbles are a versatile material. It will cost you less than other natural stone and will serve as a decoration for your garden for a long time, regardless of the climate. In addition, the features of the soil and relief when creating a pebble path do not matter. In any case, you will have a path of incredible colors and workmanship that is convenient for walking. The union of black and white pebbles looks especially impressive.

For work, you can stock up on pebbles mined in the river or sea. Sea stone for creating a path is attractive for its rounded shape and smoothness, but it is more convenient to pave the path with river stones. Medium and large pebbles are suitable, but if you are distinguished by enviable patience and perseverance, you can use small stones. Usually, pebbles produce ornaments of amazing beauty, since the tint palette of this natural material is quite wide: you can pave the alley with white, coffee, cream, black, gray, terracotta and bluish-blue fragments.
Tools and materials for creating a pebble path
- Pebbles selected according to the required parameters.
- Sand and cement for mixing concrete mortar.
- Boards for creating a template for the future track (height - 5 cm, width - 30 cm).
- Reinforced metal mesh, the dimensions of which are made 1 cm smaller than that of the template.
- Pegs, rope.
- Geotextile.
- Tarpaulin.

Pebble track creation technology
A straight path is the best option for those who learn the intricacies of working with a stone for the first time.
- Mark the outlines of the future path with wooden pegs with a rope stretched between them.
- Be sure to remove 25-40 cm of turf from the soil, otherwise the grass will grow through the pebbles and disrupt the integrity of the ornament. Pour stone chips at the bottom of the trench, on top put 2 - 3 layers of geotextile to prevent weeds from growing. Geotextiles can be replaced with tar paper or roofing felt.
- Pour several layers of sifted sand (10 cm in total) into the depression, carefully tamping each layer. Top up the sand with a dry concrete mixture with a thickness of at least 5 cm (the mixture is prepared from 1 bucket of cement and 3 - 4 buckets of sand). Then pour some water on top so that the top layer gets a loose consistency.
- We turn to the direct laying of pebbles. First of all, choose stones, the color and size of which matches the overall idea. What the track will turn out depends solely on your imagination and desire to create. For the first practical experience, a simple geometric pattern, combined from pebbles of 2 - 3 colors, is suitable. Apply a sketch of the future stone pattern to wet concrete. The deepening in the trench should not be less than 15 cm. Remember that the stones should be placed slightly above the ground level, which will allow the water to drain freely and not accumulate on the stone path.
- Pebbles are placed vertically close to each other, deepening it almost halfway into the concrete layer. When your design is ready, tamp and level the pebbles with a rubber mallet.
- The gaps between the pebbles must be filled with concrete to 2/3 of its height. Now moisten the stone with water and cover with a piece of tarp. This protective cover can be removed after 2 days to re-wet the concrete between the pebbles for more saturation. After 1 hour, use a stiff brush to finalize the gaps between the stones.
- Install curb stones along the edges of the path, leveling them with a building level. Fill the space between the stone edge and the walls of the trench with concrete.
- Cover it with a tarp for another 3 days to make your creation dry completely. After 2 weeks, you can safely wipe the stones of the pebble path with a wet rag to remove traces of concrete mortar from them.

It is interesting! There is another way to lay pebbles that will make the process of collecting a garden stone path as easy as possible. To do this, make separate parts of the path from the pebbles and separately transfer them to the place designated for the future alley. To assemble a fragment of the track, build a formwork - this is a container of 4 knocked together bars. At the bottom of the formwork, fasten dense polyethylene and reinforced metal mesh. Fill a portion of the container with some mortar and then place the pebbles there. The pebbles are placed on the edge, and not laid flat. For better adhesion of materials, wet the stones. When the finished piece of pebble mosaic has hardened, remove it from the container and place it in the space provided for the path in the garden.
For inspiration, we offer you a selection of photos of stone paths.


Pebble paths. Video
Modern landscape design is unthinkable without natural materials. Increasingly, suburban areas, recreation and residential areas are being made out. And it's not just about the cladding.
Indeed, even in work with parking lots, entrances and garden paths, they take natural stone. It would seem, what's so difficult? I took several pallets of material and put it on the mortar. But there are developments and features when using natural stone. How to do it by technology, that's the challenge!
What can you buy
There are breeds most appropriate for the garden path. We recommend taking a closer look at:

Various shapes
There are specific types of material, it is from them that builders make a start, choosing a convenient natural stone for work:
- Flagstone. Flat type. It is extremely inconvenient in laying due to the varying thickness. You can often find it in playgrounds.
- Chopped paving stones. Plain rectangular stones. A classic type of natural material, for example, for pavements.
- Cobblestones. Necessarily has roundness. It is very difficult for women in heels to walk along such a path.
- Boulders. Not the main natural material, because of its large size. But ideally fills in sharp drops and problem areas.
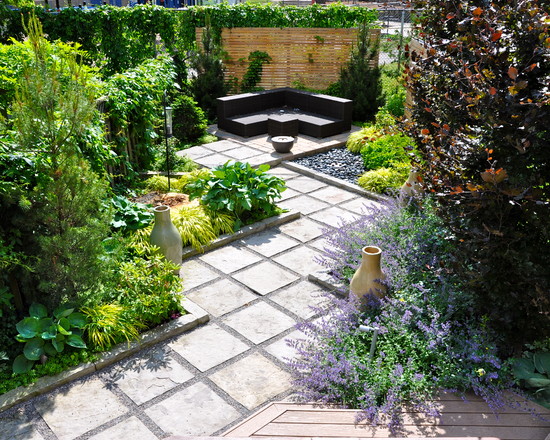
A walkway paved with marble tiles.
How to pave with your own hands
The technology of work is not related to the type or breed of material. The only difference is in the styling methods.
- A cement slurry is created, and the road surface is fixed in it. Pre-prepare a shallow trench (up to 30 centimeters). Then the bottom layer is rammed and sprinkled with sand. The latter serves as a pillow. Enough and 10 centimeters for the shock-absorbing layer. After re-ramming already sand, an intermediate gravel is poured on top. Sometimes rubble or small construction waste is used. Then concrete is poured with reinforcement for maximum strength. And only then comes the laying of the stone. This method is expensive, difficult and time-consuming; it is used only on difficult ground.
- It is much easier when there are no preliminary preparations. If a deep trench is not needed, then channels are made for the bayonet of the shovel. Then they tamp down qualitatively and close the very bottom with construction polyethylene. A layer of gravel is poured over it. And already on the rough stone there is a layer of sand (pillow). Here natural stones are laid on it.
Stone tools needed
Used in paving:
- Rubber mallets;
- Shovel and bayonet shovels;
- Levels;
- Trowels;
- LBM with attachments for working on stone;
- Brushes;
- Rope marking;
- Ramming handle;
- Vibratory rammer (for industrial scale);
- Reinforcement equipment;
- Concrete preparation equipment.
From the side building material you will need:
- Crushed stone;
- Cement;
- Sand.
Practice and rules
Any type of natural stone walkway begins to be created according to the same pattern:
Stage 1. We mark the territory. It is necessary to clear the future path or site from bushes, weeds, household rubbish and stones. Tighten the thread even with significant twisting. We just put pegs more often for fixing.
Stage 2. Carefully digging a trench the desired depth, with the expectation that the finishing layer of stone will be above surface water.
Note! There is also a third method of paving, called highly artistic.
It does not require a lot of work, however, the composition will not work without an artistic touch. The fact is that only the largest stones are bought for work, which simply fit into the place of the removed soil.
Over time, vegetation will appear in the seams of such stones, one might say and slabs. But that's the designer's move, and it's more profitable for the budget.
Works of masters: 
The most complex compositions cannot be performed without the use of stones of various sizes and shades. 
Balance between ordinary cobblestones and carvings 
The classics cannot be executed without a curb stone, therefore, when planning just such a style, it is better to stock up on a small square-shaped stone. 
In the process of laying, craftsmen often use this trick: a cement-sand mortar is placed in a bag with a cut off end and, like experienced pastry chefs, they work out each seam. 
This is roughly how a stone that has already been laid for a long time looks like according to the third paving method, when there is a minimum of preliminary preparation, and stones are almost randomly placed in place of the cut soil.
How to lay out a path from a thin natural stone
It is about a rock like sandstone or shale. It is the thin and light stone tiles that they try to lay on the stone dust. It is mixed with a cement mortar. This combination has a beneficial effect on the shrinkage of lightweight materials.
Even for thin layers of stone, it is advisable to tamp the gravel with maximum effort. And already on a hard and smooth plane, you can lay the front material.
Pros and cons of natural stone paths
From the positive:
- Choice of color and shape. There are no limits for a designer's imagination.
- Eco-friendly materials.
- With quality installation, a very robust and stable construction. The negative influences of the external environment are not terrible.
- Just figure out how to do it yourself.
From negative:
- Most breeds are very expensive.
- Wide slabs and large stones are heavy.
- There are breeds that are very difficult to compose.
- Rocks with a low strength threshold should not be used for parking lots, parking lots and driveways.
Estimated cost
Price for Moscow and Moscow region for 2017:
- Sawn sandstone from 1400 rubles / sq.m.
- Sandstone yellow from 500 rubles / sq.m.
- Lemezite slab from 209 rubles / sq.m.
- Granite from 200 rubles / sq.m.
- Lemezite from 200 rubles / sq.m.
- Sandstone "paving stone" from 2199 rubles / sq.m.
- Burnt sandstone from 750 rubles / sq.m.
- Paving slabs from 990 rubles / sq.m.
Outcome
A garden path in the private sector of a cottage village or in an elite dacha is practical, aesthetically pleasing and durable.
Educational program on video
Instructions for creating a track - from Dmitry Chernak.
A garden path made of natural stone is serious. Definitely, no other material combines so much reliability and naturalness at the same time. You can probably find the right type of rock for any landscape.
However, along the way, there are noticeable problems with the cost of the material and the complexity of installation. It is possible to overcome the indicated obstacles by doing the work with your own hands from inexpensive local natural material. Another way to reduce the cost is to use a thin flat stone as a coating.
Harmony of stone on paths with home decorationChoosing a stone for paths
The ancient Romans, while building roads, mined stone from a nearby quarry. We, however, have the opportunity to turn for a choice to our taste and harmonize the desire with the requirements of the landscape.
Stone paths are especially appropriate in the garden if there is an alpine slide or pond on the site.
Of course, the conditions for using the coating must be taken into account. The price of the material will also have to be reckoned with. The main options are granite, slate, sandstone and rubble. Also, for the construction of a coating with your own hands, the use of artificial stone is allowed. Such material is noticeably cheaper and easier to install due to the standard dimensions.
Granite paving stones withstand tanks
 Granite patterns in the yard
 We all watched how heavy armored vehicles moved along the granite pavement of Red Square, so the reliability of the coverage does not raise any questions. Moreover, granite is an amazingly beautiful material, the color range of which ranges from dark red to dark gray. It is laid in the form of a herringbone, pigtails, in an arc or staggered.
The cheapest option is a path made of rough stone or cobblestone. Crushed granite is somewhat more expensive, but the path in the garden will turn out to be smooth and aesthetic. Sawed, or sawn-chopped paving stones are noticeably more expensive, but they provide the widest possibilities for laying stone. Walkway granite is often used as a curb or in conjunction with other materials.
Shale flagstone - reliable and beautiful
 Slate walkway is reliable and unique
 The stone quarried from slate slabs comes in a variety of thicknesses and colors. Tiles can be yellow and gold, gray and burgundy, purple and black, green and brown. The stone mined in various quarries has an individual pattern structure.
The slab is quite resistant to the sun, moisture and low temperatures, and has high mechanical strength. Sufficiently sharp protrusions on the surface of the stones can harm the shoe, so this circumstance should be taken into account when choosing a coating.
Sandstone plastic - quite inexpensive
 Beige classic of popular sandstone
 Sandstone slab is used for the construction of paths in the country quite often. Due to the small thickness of the plates, from one to six centimeters, the material consumption is low, respectively, the cost of paving becomes democratic.
Pattern and color saturation of natural material can be very different. Most often, the plastic is brown, light brown and burgundy. There are layers of blue and green, white and ash color.
Rubble Stone - Local Material Available
 Inexpensive and reliable rubble stone track
 Rubble stone cannot be attributed to any specific breed. It can include limestone, sandstone or dolomite. This type of material is mined in local quarries. The only specific characteristic of a buta is a diameter of no more than 0.5 m.
The characteristics of a rubble stone are directly related to its composition. Either way, covering your garden with local material will be inexpensive and long lasting. For paving, you need to select stones that are similar in size. In this case, it will be easier to build a path.
Round pebbles are a decent option
 A pebble path can be very beautiful
 Pebbles are the same stones, only small ones. So the covering for the house and the cottage made of rounded stones will last a long time. River pebbles are better suited for paths than sea pebbles, as they are more rough. The easiest way is to make a pebble cover in the form of a mound. At the same time, small pebbles creep under the feet. To mitigate this effect, do not lay a coating layer more than 70 mm thick. Read more about bulk paths in a separate article.
 Multicolored pebble non-woven carpet
 You can create a real work of art with your own hands from pebbles laid on a cement mortar in the form of a pattern. Of course, this will require a lot of effort. But there is an opportunity to be realized and get a beautiful and reliable path, without resorting to significant costs.
Having conceived a track with a certain pattern, it must be depicted in advance on paper. The work will be accelerated if the pebbles are sorted by color and size beforehand.
Please note that pebbles with a diameter of more than 5 cm will not adhere well to the coating canvas.
Scroll the necessary tool is given in the table.

Materials other than pebbles will require crushed stone, sand and cement. Stock the curb if you plan to use it. For work, prepare a piece of board with a section of approximately 30x120mm and a length across the width of the covering. With your own hands, a pebble path can be made according to the following scheme:

 Pebble patterns
 Paving according to the rules of a stone path
Paths of thin stone plates or slabs should be laid on a concrete base. If the pavement is set up on a car site, the concrete must be additionally reinforced.
A stone with a thickness of more than 5-7 cm on footpaths can be laid on a cushion of rubble and sand. In any case, the coating should be installed 2 cm above the ground level to ensure water drainage from its surface. When building paths from natural stone, you will need the following tool:

Laying slabs on a concrete base
A wild stone path can be made as follows:

Note that the edge of the path can be left uneven and the stones not cut. However, this will make it difficult to mow the lawn if it is adjacent to the surface.

As follows from the photo, often the landscape does not require the use of paths with a continuous coverage. In case of rare use, for example, on a lawn, near a pond, it is enough to lay a path from separate stone slabs in a flower garden.
In this case, a pit is prepared under each of the stones, 15 cm of crushed stone is poured and rammed. Large stones are placed on a grout and hammered down with a rubber hammer. Let the concrete cure securely for a week before using the path.
Stone paving on a cushion of rubble and gravel
To pave a path made of natural stone without using cement, you will additionally need sand and crushed stone. The list of required tools is given in the table.

We lay a path made of thick wild stone on the sand according to the following scheme:

Options for the design of seams on the coating
 The grass between the stones organically links the path and lawn
 As follows from the photo, the gaps between stones on garden paths do not have to be filled with mortar, sand or crushed stone. Often, the use of "live" filler in the form of grass becomes more harmonious. For these purposes, most often used navel noble or creeping thyme. A cuff is suitable for small seams. Wide gaps are planted with bryozoan.
In any case, the grass doesn't like too many people walking along the garden path. Upon completion of the paving, the joints between the stones are filled with fertile soil and compacted. A mixture of soil with grass seeds is poured into the space vacated after tamping and compacted again. The surface of the coating is covered with burlap and watered daily. The stone path that you made with your own hands will delight everyone for decades.
To get a better understanding of the paving process, we recommend watching the following video.