Leg warmers knitting patterns new items. How to knit leg warmers: patterns for knitting needles and crochet. Knitting technique for leg warmers
In the coming year, knitted leg warmers will become the most popular accessory, so many novice needlewomen are already surfing the Internet to learn how to knit leg warmers. We suggest that you do not waste your time searching, but immediately start studying leg warmer knitting patterns with a detailed step-by-step description of all the steps!
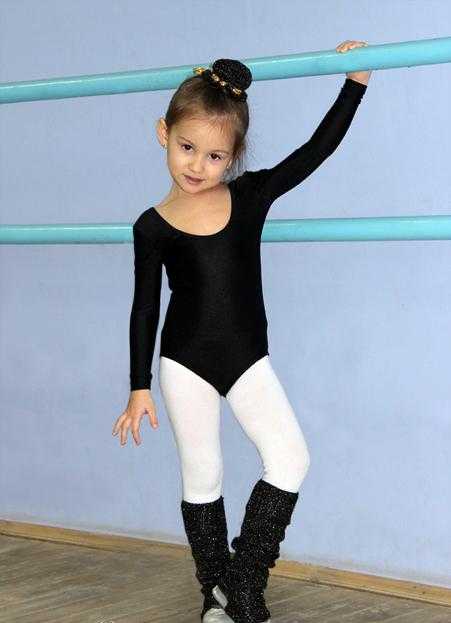
Leg warmers are considered an indispensable item for dancing. Thanks to gaiters, the muscles warm up much better during dancing and retain heat longer. In some cases, during dancing, this knitted accessory helps to avoid bruises and abrasions. Today, especially for beginning craftswomen, we want to talk about how to knit comfortable and exclusive leg warmers with your own hands for a girl who is interested in dancing.


For knitting, beginning needlewomen will need:
- a pair of double needles, number 2;
- shimmering black yarn “Pekhorka” - 100 g (430 m);
- size chart according to which you can knit leggings not only for girls, but also for adult women.
When describing the knitting pattern we will use the following abbreviations:
- n. - loops;
- n. – yarnover
Knitting technique for leg warmers
 Description of the technique of knitting leg warmers 26 - 27 r.:
- you need to cast on 49 sts with knitting needles;
- then knit in a circle with an elastic band 1 by 1 exactly seven centimeters;
- after that, tie another twenty-four centimeters of faces. smooth;
- close the side of the heel 24 p;
- last buttonholes – 24 pcs. we knit faces. satin stitch;
- then we dial on another 24 p.;
- We continue knitting according to the same pattern. That is, with a 1X1 elastic band until the knitted fabric grows by 7 cm;
- The cutout on the heel, as well as the edges of knitted leg warmers for dancing, must be tied with a post without a stitch.
Leg warmers for a girl who loves dancing are ready! We hope that thanks to this small master class, every beginning needlewoman will be able to knit this fashionable accessory for her daughter, granddaughter or sister!
Knitting pattern for leg warmers
The knitting pattern for leg warmers is very similar to the pattern for creating socks or knee socks. Although the process of creating this accessory is considered quite labor-intensive, even a novice craftswoman can master it.
 Today we invite you to learn how to knit leg warmers for girls 2–3 years old, so that later, using the same pattern, you can easily knit this accessory for yourself. So, to knit this piece of clothing for gymnastics or dancing you will need:
- 50 g of cotton thread;
- a pair of knitting needles number 2;
- beads for decoration.
List of abbreviations:
- R. – rows;
- n. - loops;
- faces., LP – facial;
- purl – purl;
- n. – yarnover
Description of the technique of knitting leg warmers for girls. First, we cast on 52 stitches on knitting needles. Then we distribute the cast-on loops onto 3 or 4 knitting needles and knit in the round. After this, we close the knitting in a circle. To prevent the knitted product from becoming deformed during wearing, we knit 1 stitch in two threads. That is, to form the first loop we use not only the main working thread, but also the tip of the thread formed during the cast-on. As you probably already noticed, the description of the work is simple and also quite detailed. Therefore, even a novice craftswoman can easily master the technique of knitting leg warmers for girls. Next, according to the description, you need to knit 15 rubles with an elastic band 2X2.
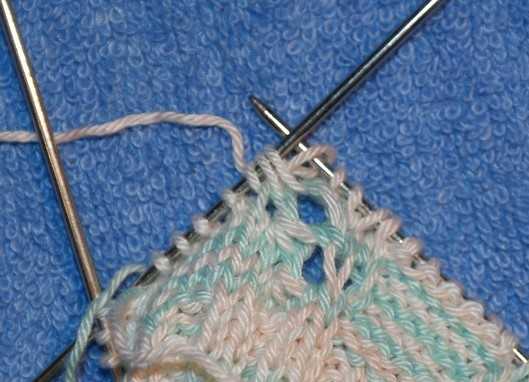
At this stage of this small master class with a detailed description of all the steps, we want to focus your attention on the technique of making a pattern designed for 26 stitches. To make it more convenient to work, we recommend that beginning craftswomen transfer all the stitches necessary to form the pattern onto one knitting needle. In this case, the remaining loops must be distributed over two other knitting needles and the 2X2 elastic band must be continued. Detailed description of the knitting technique. The first row starts with LP - 10 pcs. and ends with the same - 6 pcs. In the middle, 6 purl stitches are knitted. The second one, as well as all subsequent counting rows. we knit strictly according to the pattern. We form N. using LP. R. No. 3 begins and also ends with the LP. – 6 pcs. Knit between them: 3 stitches together. for the top piece, n., k.. Then another n., 6 p., n., knit., n., 3 sts at the same time k., but now for the lower parts of the pattern.
Now we return 2 stitches to the left needle and continue working. After looking at the photo, you can learn how to knit stitches using the upper segments. And also for the lower ones. If you carefully follow the description, you will end up with a pattern with the same “knots” as in the photo.
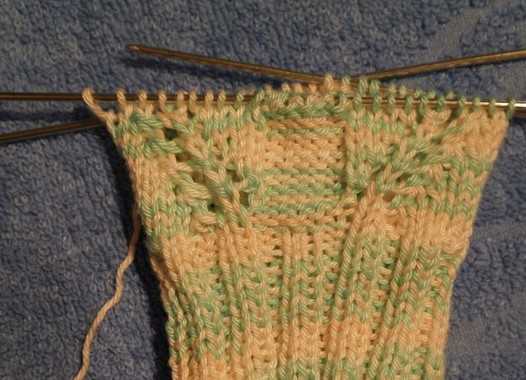
Row No. 5 starts with faces. and ends with them - 5 pcs. at the end and the same at the beginning. Between them, 3 stitches are performed simultaneously. for the upper details of the pattern, while turning the third stitch. Next: n., knit., n., knit., purl. – 6 pcs. Again knit, knit, knit, knit. Now 3 sts together knit, but for the bottom ones, knit 5. R. No. 7: knit 4, knit 3 together. for the upper lobes, n., knit., n., 2 knits., 6 p., 2 knits., n., knit., n., 3 sts together for the lower lobes and 4 knits. No. 9: persons. - 3 pcs., 3 p. - according to the same pattern as before. Then n., persons. p., n., persons. p. – 3 pcs., purl. – 6 pcs., persons. p. – 3 pcs., yarn over, knit, yarn over, perform 3 p. at the same time (knitting pattern does not change) and 3 LP. No. 11: LP. – 2 pcs., 3 p. We form at the same time according to the same pattern as in the previous rows. Then knit, knit, knit, knit 4, purl 6, knit 4, knit, knit, yarn over, knit 3 stitches at once and knit 2. At 1 p.m. We return to the description of the third row and continue working according to the pattern until the knitted product grows to the length we need.
To get your own knitted leg warmers, you will need a knitting tool - knitting needles. As we already discussed in the previous part of the article, for different knitting options, from 100 to 300 grams of yarn can be useful: as you can see, you can use the remnants of skeins that have been preserved from other knitted creations.
For the most impatient, a very simple and quick method of leggings is offered. To work, you will need the following yarn: plain or colored thread, smooth or with a slight pubescence - in general, almost any thread, except for thick, too fluffy or too twisted threads. We choose circular knitting needles according to the recommendations on the skein label, taking into account that the knitting should be a little loose. Next, we cast on loops for the bottom edge on two knitting needles. The number of loops is determined by measuring the circumference of the calf under the knee and a knitting pattern of 10x10cm. Then we begin to knit a straight fabric: picking up only the purl stitches, we get a garter stitch.

The edges of this fabric, as in all cases with garter stitch, will be slightly tucked, which in this case is beneficial, because It is these thin rollers that will be the upper and lower sides of the leggings, i.e. with an elastic band. The height of the canvas is the height of the leggings. Then we connect the side edges of each individual fabric with a soft seam. It is better to sew with the same thread that was used for knitting. The seam must be loose to maintain the elasticity of the product. We get soft leg warmers that will look nice when gathered, and the more pleats, the more impressive they will look.

.jpg)

Another simple way to quickly knit is leg warmers made on stocking needles. Stocking knitting needles are a set of 6 knitting needles on which they are knitted in a circle, and then the product is obtained without seams. This is how classic stockings and socks are knitted. Again you need to start from measuring the calf circumference, only now the number of loops should be divided by 4, because all loops are distributed onto the knitting needles. The fifth - working - knitting needle is used for knitting each next row.

It is permissible to knit with knit stitches around the circumference, then we get a knitted tube that will resemble a high golf course, only without the lower part with the toe and heel. In another case, you can knit the entire legging with an elastic band, i.e. alternate 2 or 3 purl and knit stitches throughout the knitting. Then the leg warmer turns out to be more tight-fitting, and the pattern of vertical stripes of elastic will visually lengthen the silhouette of the calf and the entire leg.
Based on knitting on stocking needles, you can create an unlimited number of options - as your imagination dictates.

Another simple knitting option is tight-fitting leggings. Leg warmers that follow the contour of the tops look great on short boots or ankle boots, as if they were a continuation of them.
For gaiters you will need about 120 g of black yarn (or the color of the shoes you will use them for), knitting needles No. 3 or No. 2.5. For such tight-fitting leg warmers, we take two measurements: the girth of the calf at the widest point and the girth of the ankle. We start knitting from the top elastic, casting on the number of loops calculated according to the knitting pattern. For example, for a circumference of 36 cm, you need to cast on 84 loops of thread from a skein of 100 g wool blend yarn, 260 m long. It is better to try on the knitting at the beginning of work to make sure that the fit of the product is comfortable for the leg. We knit 2/3 of the total length of the product with knit stitches or an elastic band, and then, when the knitting approaches the ankle area, we begin to decrease the loops so that the size of the circle approaches the value of our second measurement - the circumference of the ankle. If you knitted with stockinette stitch, then finish the knitting with a simple elastic band.
.jpg)
Now you can add a twist - decoration. Gaiters can be decorated by threading a thread or ribbon of a contrasting color along the top or bottom of the product. You can decorate the outer side of the knitted boot with a neat medallion, for example, a tiered flower knitted or crocheted, or several beads, or tassels twisted from the same yarn, or pieces of fur (which is especially fashionable in the fall of 2013). The product will be unique, but at the same time classic in design.

Sports youth style welcomes a variety of colors and a bright image. Therefore, we choose multi-colored acrylic yarn for knitting (you will need no more than 150 g). The labels contain the mark “Multi-color” and double needles No. 3 or No. 3.5. We knit tube leggings in stockinette stitch with a soft, not very dense knitting. We get thin “dancing” color stripes, which are arranged in random order and create the colorful mood of the product.
Keep experimenting with knitting techniques and trims and you'll end up with an exclusive addition to your wardrobe.
Knitted leg warmers came into our everyday life from sports. They are convenient for playing football, aerobics, and yoga. Leg warmers are essential for dancing. Buying leg warmers in your size can be difficult. We suggest you knit leg warmers with knitting needles. A variety of stylistic and color solutions will allow you to choose the best option for yourself. Leg warmers can be knitted from dense threads in a simple pattern for beginner craftswomen - then they will warm your legs in frosty weather. You can knit original openwork ones, or there are models in ethno style.
Simple and warm
Let's start with the simplest model. These socks are useful for dancing and playing sports.
Their length is 40cm.
We will need:
- thick yarn of mixed composition with a predominance of wool;
- set of sock knitting needles No. 3.5-4.
Pattern used: rib 3k.x2p.
Knitting density: 22p. for 30r. correspond to a square of 10 cm by 10 cm.
Description
We dial 60p. and knit in a round 40cm. We close the loops according to the drawing.
Simple model: video master class
Striped
To work you will need:
- gray yarn of mixed composition (50g per 200m) – 100g;
- dark gray yarn of mixed composition (50g per 200m) - 50g;
- set of toe knitting needles No. 2.5.
Patterns used:
- elastic band 2 knits x 2 purls;
- persons satin stitch: when knitting in the round, knit all stitches;
- openwork: knitted according to patterns A, B, C. In even rows we knit all the loops and yarn overs.
You need to repeat rapports in a row - see diagram.
Knitting density: knitting. Ch.: 30p. by 42r. correspond to a square of 10cm by 10cm, on openwork: 26p. for 42r. correspond to a 10cm by 10cm square.
Description
We dial 72p. gray threads and switch to circular knitting, distributing all the loops into 4 sp. - 18 on each. Next we knit 10 rubles. rubber bands, 1 rub. front, 12cm openwork - pattern A (we finish with the 6th or 12th row of the pattern). Then - 5 rubles. rubber bands. Change the thread to dark gray. We knit 1 p. facial, 5 rub. rubber bands, 12cm openwork - pattern B, 5r. rubber bands. We return to gray again. We knit 1 p. with this color. facial, 5 rub. rubber bands, 1 rub. knit, 12cm openwork - pattern C (we finish with the 8th or 16th row of the pattern), 10 rubles. rubber bands. We close the loops.
Model with arans (braids) on 5 knitting needles: video master class
Leg warmers with frills
Such beauty can be knitted for both young women and children. We simply reduce children's sizes proportionally.
To work you will need:
- gray yarn of mixed composition (50g per 130m) -200g;
- some purple thread;
- set of toe knitting needles No. 3;
- hook No. 2.5;
- additional circular needles.
Description
We dial 84p. and switch to circular knitting, distributing 21 stitches. on a knitting needle. Let's knit 12 rubles. rubber bands 1l.x1p. In the next row we knit 2 stitches from each stitch. We remove each added stitch onto an additional knitting needle - we will knit frills from these loops. We continue the main knitting 3p.x1p., adding 1p. on each sleeper (i.e. we have 22 points per sp.).
Having knitted 7cm, we repeat the increase as described and remove the additional loops. sp.
Having knitted 3.5cm 3L x 1P, we begin to make decreases: in every 8th p. decrease evenly in 3 stitches, knitting from 2 stitches. one front one. Having knitted another 3.5 cm, we repeat the increase on the frills and the removal of the loops on the additional one. sp. We repeat 2 more times, 7 cm each with decreases (see above), removing the item for the frills. We get 5 frills. After the 5th we knit 12 rubles. 1L x 1P and close the loops.
Frills
Let's knit in a circle of faces. satin stitch Starting from the second r. in every 3rd r. we make increases by knitting from 1p. - three. We must knit 10 rubles, three of which with increases. Distribution of additions: for the 1st and 2nd frills we make them every 3rd row, i.e. 6 increases; for the 3rd and 4th frill - in every 3rd r., i.e. 5 increases; for the 5th frill - in every 3rd r., i.e. 4 increases. We tie the edge of the frills with purple thread in single crochet stitches. To give the product its shape, it needs to be lightly steamed.
Children's model with Lotus pattern: video mk
Leg warmers in ethno style
These knitted socks for women are made with folk Tyrolean motifs. They go perfectly with high heels.
We will need:
- h/w yarn of black, milky, bronze, white, sand colors - 50g of each (50g per 100m);
- sp. No. 4;
- markers;
- needle with a large eye;
- buttons Ø 20mm – 14 pieces.
Finished dimensions: length - 53.5 cm (stretched), volume at the widest point - 35.5 cm.
Knitting density: 21p. for 28 rub. correspond to a 10cm by 10cm square. Before work, it is recommended to perform a sample according to cx. 2 – check the length.
Description
Left
We cast on 75 stitches with bronze threads and knit 32 rubles. according to cx. No. 1 with straight fabric.
Knitting the next row on the wrong side. side, mark it with a marker and close it for circular knitting. Ignore the discrepancy between the pattern at the joint. A button placket will hide this flaw.
Knit faces. satin stitch 9.5 cm. Knit 5 times in cx. No. 2 20 rows of rapport, decreasing 9 times at the end of every 10 rubles. 1 p. We will have 57p left. We continue to knit 15 rubles. according to cx. No. 3 at 57p. (the first is the edge one).
Bottom cuff
Knit 4cm of elastic band 2L x 2P. Close the loops.
Button placket
On the front side, using bronze threads, starting from the bottom cuff, below the decrease line, cast on 102p. We complete the set at a height of 2.5 cm of the top drawing cx. No. 2. Having knitted 4cm strips, close the loops. Carefully sew the edges of the strip. Sew buttons at equal intervals. If you couldn’t find buttons exactly matching the color of the threads, don’t worry - you can crochet them with the necessary threads. Sew the top cuff from the inside.
Right
We will knit according to the same description, except for the strap. It is more convenient to knit it from top to bottom: that is, we start the set with 2.5 cm before the first repeat of cx. No. 2. We dial 102p. and connect according to the previous algorithm. We design the right one in the same way as the left one.
With a braid pattern: video mk
Knitted leg warmers made from “grass”
Cute little white knitted socks look very original and are easy to knit.
To work you will need:
- plain white mixed yarn - 100g;
- white “grass” yarn – 100g;
- set of socks No. 3.5.
Patterns used:
- elastic band 2 knits x 2 purls;
- purl satin stitch: when knitting straight - in faces. rows, all loops are purl, in purl. rows - facial ones.
Description
Cast on with a smooth thread 42p. and tie an elastic band 3cm high. We switch to “grass” threads. Having knitted 2 p. from it. satin stitch, change the thread to a smooth one and knit 4p. Alternating the threads in this way, we knit 25cm in height. Then we knit 3 cm 2l.x2i with a smooth thread. We close the loops. We carefully sew it together.
High model of leggings: diagram
Openwork
Dimensions: length 40cm, width 27cm, elastic band diameter at the bottom 13cm.
We will need:
- acrylic yarn - about 200g;
- circular sp. No. 6;
- marker.
Knitting density: 24p. for 16r. correspond to a square 10 cm by 10 cm
Description
We start knitting leg warmers with knitting needles from a set of 48p. We switch to circular knitting. Place a marker at the connection point. We knit 5cm 2L x 2P.
We switch to openwork and perform 10cm according to the scheme:
1r.: *2l, 1l. for the bottom slice, 1i.* - repeat from * to * until the end of the row;
2p.:*2p.in 1p., 1n.,1l., 1p.* – repeat from * to* until the end of the row;
3R: *3L, 1P* – repeat from * to* until the end of the row;
4r.:*1l., 1n., 2l. for the bottom slice, purl 1* – repeat from * to* until the end of the row.
After this, we begin to add loops: in every 4th r. Add 1 stitch symmetrically from the marker. We do this 8 times. We end up with 64p.
The winter season is perhaps the best time to take the gaiters out of the closet drawer, wash them and put them on your child to keep him warm. Children's legwarmers are all the rage right now. At the same time, if you don’t find them in stores, you can knit them with knitting needles.
This won't be that difficult to do. A little perseverance with patience, mastery of needlework techniques - and the new thing is ready. We knit the product with knitting needles and also with crochet. Those needlewomen who are just mastering this art should choose the simplest patterns. Let's look at them in this article.

Initially, measurements should be taken from children. You can knit leg warmers not only on two, but also on five regular knitting needles. It is not so easy to say which method of doing work is simpler for a less experienced needlewoman.


In the case of two knitting needles, the fabric will need to be stitched. Another option will require the ability to correctly distribute stitches with knitting needles. Regardless of this, the following measurements are required:
- leg circumference under the knees;
- calf circumference;
- calf girth;
— distance from the knee to the middle part of the calf;
— the distance between the middle of the calf to the ankle;
- the length of the product itself.
Bright gaiters for cold weather over bootsYou can also knit on knitting needles without a pattern. If you have children's leg warmers that have a seam, then you need to make a pattern. Draw a small rectangle on a millimeter measure. The largest of its sides is equal to the length of the product.
The small one is identical to the calf girth. Position the figure vertically, this will make it easier for you to construct. Divide the two small sides in half and connect their middles with a line. Mark the vertical, marking the distance from the line above from the knee to the middle of the calf to the ankle.


Let's draw thin lines that will be parallel to the horizontal sides. After this, on the top line we lay off the half-circumference of the legs under the knee from the vertical in two directions, on the next line at the top - the circumference of the shin, on the bottom there should be the circumference of the ankle. Connect the ends of the lines on all sides with small curves.
At the bottom, be sure to draw a lapel in the shape of a rectangle or an increasing trapezoid.
In the first situation, the product will cover only the upper part of the shoe, in the other - a limited instep area. Ask your children which option they like best. With these knitting needles you can create different knitted items.


The most common pattern for knitting leg warmers, which is accessible even to the least experienced craftsman, is stocking stitch. Cast on 20 stitches, knit the first row, purl the next row. Count the number of loops for each centimeter horizontally, as well as the number of vertical rows. We determine exactly how many loops you need to cast on. Vertical counting helps to accurately calculate the order of decreasing or increasing the number of loops. Knitting will not be difficult for you.

Let's consider another knitting pattern for the product, which is distinguished by its simplicity.
- Try initially making knitted leg warmers for your child with a knitted seam. This is very simple, because you are making a fabric, which will then need to be knitted (sewn) together.
- For this purpose, cast on 50 stitches on knitting needles 4 mm thick.
- Of these, 110 rows should be knitted. They all must be completely identical. You need to alternate a couple of front turns with a pair of purl turns.
- We close the loops on the last row and wash the emerging panel. This must be done so that the knitted children's leg warmers do not begin to shrink over time.
- At the final stage, the panel needs to be sewn together. It is best to do the work with contrasting threads, and also embroider something along the seam. Some decorate this place with ribbons and bows. You can use matching threads - then the product will be practical, but at the same time quite modest.
Now the children's leg warmers are completely ready to wear. In general, such knitted products are very unpretentious to create. You can make them with the most ordinary knitting needles. We just knit as carefully as possible, because you are doing all this for children.
 Pink leg warmers with holes for girls


 Scheme of leggings with a relief pattern
 Gaiters are a knitted, leather or cloth overlay that is worn over shoes, leaving only the sole exposed.
History of spats
If you look back, gaiters were originally made of leather. The leather was rough and tanned. Such gaiters performed an exclusively protective function, preventing leg injuries during combat or saving the skin from wounds in impenetrable forests.
You can compare leggings to stockings, only without soles. Initially, the leggings themselves were called gaiters or shanks, as well as boots.
In the 17th-18th centuries, such clothing was popular among both men and women. Women's versions have become more beautiful over time, decorated with embroidery and patterns, while men's have remained laconic. However, at the peak of popularity, there was no big difference between the women's and men's pairs - they were all made of coarse cloth of light gray or beige color and trimmed with a row of buttons along the edge of the canvas.
Who uses gaiters
A new surge in the popularity of leggings occurred in 1970. At this time, everything related to the fashionable trend - aerobics - was in special demand. Colorful and bright warm leg gaiters that do not restrict movement instantly won the hearts of the female half of the population.
Dancers and professional gymnasts actively use this accessory to keep the working part of the leg warm. Before training, to warm up the muscles, gaiters of the required length are put on, which are removed after some time.
Travelers all over the world also appreciate the functionality of the gaiters. Made from waterproof and windproof modern materials, they perfectly protect shoes and open areas of the leg (for example, between the boot and the cuff of trousers) from the piercing wind and rain.
If previously gaiters performed the protective function of the legs for the military, now this role is assigned to the high tops of boots. Essentially, the shaft is a gaiter attached to the last of the boot.
The largest percentage of leggings consumers are young girls. In 2004, leg warmers regained their former popularity. The progress that has occurred over the years of their absence allows us to invent and produce any models - knitted, knitted, decorated with patterns, stones, decorative bows or beads.
Knitted leg warmers
Peasants were the first to wear knitted leggings. They were worn over pants, tied at the knee with an elastic band. Easy to remove, easy to clean without staining your main clothes.
To knit leg warmers with knitting needles, you don’t have to look for long diagrams and descriptions. Many different ideas are offered to suit every taste. When choosing a pattern for knitted leg warmers, you need to determine what clothes they will be worn with. For example, leg warmers with a jacquard pattern will look better with clothes in laconic shades, pairing well with accessories in the same style.
To knit leg warmers with a jacquard pattern without a toe and heel, you will need threads of two colors - green and white (or black). The composition of the thread should not be synthetic, otherwise the legs will be uncomfortable and an allergic reaction may occur. If the leg warmers are knitted for cold weather, natural wool thread is best.
You need circular knitting needles, their size should correspond to the thickness of the thread. Recommendations for choosing knitting needles are on the yarn packaging of any manufacturer.
Description of knitting
In order for the knitted leg warmers (with knitting needles), the diagrams and descriptions of which are attached, to be the right size, you need to measure the circumference of the leg at the ankle and the circumference of the leg at the calf at the widest part with a centimeter tape. Measurements are taken according to the model - short ones only cover the ankle, tall ones can reach the very knee. If the selected model will be worn over shoes, measurements must be taken along the part of the leg in the shoe.

How to knit leg warmers with knitting needles if the difference in girth is large? To do this, you will need to add stitches at the beginning and end of the row.
After the measurements and calculations have been made, we begin to set the loops. The number of loops is cast on the knitting needles so that the length of the resulting chain is equal to the girth in centimeters. Next, the knitting process itself begins.
The jacquard pattern is knitted along the front side, in rotating rows; on the back side, the pattern is read symmetrically - instead of green, a white thread is used, and vice versa. The unused thread is pulled inside the loops. It is important to take this into account when purchasing yarn - consumption with the jacquard technique increases almost 2 times. All stitches are knitted.
To ensure that the leg warmers, knitted on two knitting needles, sit tightly on the leg and do not slip off, the work is completed with 7-10 rows of classic English elastic. The first loop is removed, knit, purl. So until the end of the row. The latter is knitted purlwise. The work turns over and the knitting proceeds as the loops look.
Once the elastic band is completed, the loops are closed.
Sew the fabric with a light-colored thread using a knitting needle or a needle with a blunt end, being careful not to separate the yarn fibers.
Knitting on 4 needles
How to knit leg warmers with knitting needles so that you don’t have to sew them? The best option is knitting on 4 needles using the hosiery method.

Knitting starts from the top. Knit 5 cm with an English rib pattern, then begin to form the leggings pattern. If they have a relief and voluminous pattern, then start knitting it, but if there is no special pattern, then you can knit the entire legging with an elastic band.

To knit a leg warmer with braids, the number of loops is a multiple of 4. Then these loops are evenly distributed onto 4 knitting needles so that there are no gaps between the distributed loops. The first and last loops participate in the formation of the pattern; they are knitted not with edge loops, but according to the pattern.
To knit bright leg warmers with a braid pattern, you need to use melange-colored yarn and a set of stocking needles.
Cast on a number of loops equal to the circumference of the leg at the top of the gaiters (calf). For medium calf sizes, cast on 60 stitches.
Now the first row is knitted using four knitting needles. Take the first knitting needle, knit 15 stitches with it, the next 15 with another knitting needle, the next 15 with a third knitting needle, and the remaining with a fourth knitting needle. The fifth knitting needle is taken as a working one.
The bright leg warmer is knitted with a “braid” pattern.
- 1st row: 1 purl, *knit 4, purl 2*, at the end 1 purl;
- 2nd and all even rows: according to the picture;
- 3rd row: 1 purl, *knit 4, purl 2*, at the end 1 purl;
- 5th row: 1 purl, *4 loops are crossed to the left (2 loops are removed on an auxiliary needle before work, 2 loops are knitted with knits, then loops with an auxiliary knitting needle are knitted with knits), 2 purl*, at the end - 1 purl;
- 7th row: repeat from 1st row.
In order for the product to fit well to the shape of the leg, smooth additions and decreases of loops are made in the areas of the shin, calf, and ankle.
By experimenting with knitting patterns, you can make the braid asymmetrical - knit one strand narrow, of 2 loops, and the second wide, of 6 or more.
Gaiters on 4 knitting needles have a distinctive feature from those knitted using 2 knitting needles - they do not have a seam. In some cases it is necessary, and in some cases its absence is only a plus.
Leg warmers for children
This is a comfortable uniform for children. When it’s already quite warm outside, but there may still be sudden changes in the weather, such an accessory will come in handy.

To knit leg warmers for a girl or a boy, you need to choose a yarn that is not too scratchy so that the child can walk comfortably in them. Children's leg warmers are best knitted using jacquard patterns. The design can be completely different - boats or anchors, balls are suitable for boys. The best color to use is dark - blue, green, brown. Knitted leg warmers for girls can be knitted with threads of bright and cheerful colors, with a pattern of hearts or flowers.
For children's leg warmers, a simple pattern is suitable.

The pattern is knitted according to the pattern where:
- I - knit 1 knit;
- O - 1 knit, 1 purl;
- ~ - purl 3 together;
- W - 3 loops from one.
Leg warmers for men
You can knit men's leg warmers using the same pattern as women's ones. Plain high leg warmers in green, bottle or blue shades suit men well; the pattern should not be too delicate. Young guys like to wear mid-height leg warmers with high, rough boots.

To knit men's leg warmers, you need to cast on the required number of loops. Next, 3 rows of elastic 1 x 1 or 2 x 2 are knitted. After the elastic, they begin to form the pattern.
The simplest pattern is “tangle”. It is well suited for a men's wardrobe, as it is quite laconic, but at the same time interesting.
The pattern is knitted very simply - first row - alternating stitches: knit - purl. So until the end of the row. The first and last loops are edge loops.
The second row is knitted the same way as the first: knit - purl.
Each row starts like the first. In this case, both the wrong side and the front side are knitted in exactly this way. Due to the fact that above each loop a loop is knitted, the opposite of the working one, the pattern turns out to be a little confusing.
Leg warmer decoration
Having knitted the leg warmers to the end, you can put the diagrams and description aside and start decorating the accessory. To do this, you can crochet the edge of the product, forming a beautiful and openwork border or flounces. In addition, to knit leg warmers, patterns and descriptions can be taken from different sources. And if you experiment, you can knit a product that is unique and unlike others.